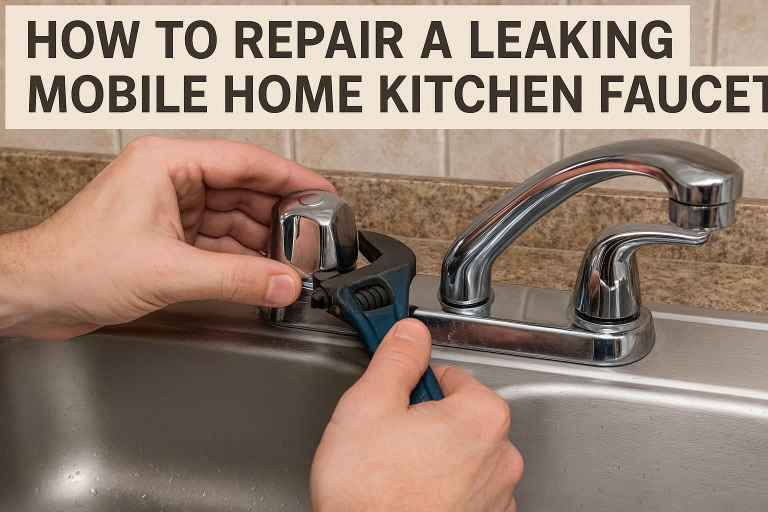
Leaky kitchen faucets are one of the most common issues homeowners face, especially in mobile homes where plumbing can be more prone to wear and tear. If left unchecked, a leaking faucet can lead to water damage, increase your water bill, and cause unnecessary stress. The good news is, repairing a leaking mobile home kitchen faucet is a task that you can tackle yourself with the right tools and a bit of know-how.
In this guide, we’ll walk you through the various causes of leaking faucets, how to fix them step-by-step, and offer tips for different types of leaks, including single-handle faucets, two-handle faucets, and even Delta faucets commonly found in mobile homes. Whether you’re a seasoned DIYer or a first-time fixer, this guide will help you repair your leaking faucet quickly and easily.
Understanding the Problem: Why is Your Mobile Home Kitchen Faucet Leaking?
Before you dive into repairing your faucet, it’s important to understand why it’s leaking in the first place. Leaky faucets are Ideas for Kitchen and Living Room usually a result of a few common issues:
Common Causes of Leaky Kitchen Faucets
- Worn-out Washers: Over time, washers in your faucet can deteriorate, causing water to leak through. This is especially common in older faucets or those that have been used heavily.
- Damaged Seals: Seals or O-rings create a watertight barrier around your faucet handles. If these become damaged or worn, they can cause leaks.
- Loose Connections: Sometimes, a simple loose connection between parts of the faucet or plumbing system can lead to leaks.
Types of Leaks
Leaks can occur in different places on your faucet, including:
- Spout Leaks: Water leaking from the spout is usually caused by worn-out washers or corroded valve seats.
- Base Leaks: If water is leaking from the base, it may be due to a worn O-ring or loose connection.
- Handle Leaks: Leaks from the handle are often caused by damaged seals or washers.
Specific Issues in Mobile Homes
Plumbing in mobile homes is often more compact and flexible than in traditional homes, which can sometimes make it harder to diagnose and fix leaks. Mobile home faucets may have smaller, less durable parts, which can cause leaks more frequently. Additionally, water pressure issues and older plumbing can contribute to leaks.
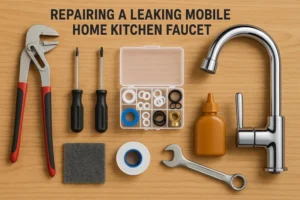
Tools and Materials You’ll Need for Repairing a Leaking Mobile Home Kitchen Faucet
Having the right tools and materials on hand is crucial for a successful repair. Here’s what you’ll need:
Basic Tools
- Adjustable Wrench: To loosen or tighten faucet components.
- Screwdriver: For removing faucet handles and other components.
- Pliers: Helpful for gripping and removing stubborn parts.
- Allen Wrenches: Often required for single-handle faucets to remove the handle or cartridge.
- Faucet Repair Kit: Contains washers, seals, and O-rings specific to your faucet model.
Materials
- Replacement Washers, Seals, or O-rings: These are the most common parts that need replacing when repairing a faucet leak.
- Plumber’s Tape or Sealant: Useful for sealing connections and preventing future leaks.
- Cleaning Cloths or Towels: To wipe up water and debris during the repair process.
How to Fix Leaky Kitchen Faucet Single Handle
Single-handle faucets are a popular choice due to their ease of use. However, they can develop leaks over time, often due to issues with the cartridge or seals.
Identifying the Problem
- Leak from the Base or Spout: This could indicate a problem with the cartridge or valve seat.
- Drip or Continuous Flow from the Handle: This often points to worn-out seals or O-rings inside the handle assembly.
Step-by-Step Instructions for Repairing a Single-Handle Faucet
- Turn Off the Water Supply: Locate the shut-off valves under the sink and turn them off. Open the faucet to release any remaining pressure.
- Remove the Handle: Use an Allen wrench to remove the handle. Depending on the faucet model, you may need to unscrew a cover plate first.
- Inspect the Cartridge: The cartridge is the part responsible for controlling the water flow. If it’s damaged or worn out, replace it.
- Replace Worn Seals or O-rings: Check for any worn-out seals or O-rings around the cartridge or handle. Replace them as needed.
- Reassemble and Test the Faucet: Reassemble the faucet, turn the water supply back on, and test for leaks.
How to Fix a Leaking Kitchen Faucet with Two Handles
Two-handle faucets are common in older mobile homes. These faucets can leak if the washers or valve seats become worn out.
Causes of Leaks in Two-Handle Faucets
- Worn Washers: The washers in the valve seats may degrade over time, causing water to leak from the handles.
- Damaged Valve Seats: If the valve seats are corroded, water can leak through the handle.
Step-by-Step Guide
- Turn Off the Water Supply: Close the water supply valves and open the faucet to drain any remaining water.
- Remove Both Handles: Use a screwdriver to remove the handle screws, then pull off the handles.
- Remove the Valve Stems: Use an adjustable wrench to remove the valve stems from the faucet.
- Replace Washers and O-Rings: Inspect the washers and O-rings. Replace any that are damaged or worn out.
- Reassemble and Check for Leaks: Reassemble the faucet, turn on the water, and check for leaks.
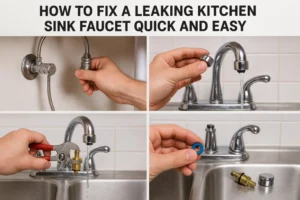
How to Fix a Leaking Kitchen Sink Faucet Quick and Easy
If you’re in a rush and just want to address a small leak quickly, there are a few easy fixes that can help.
Quick Fixes for Small Leaks
- Tighten Loose Nuts and Bolts: If the leak is coming from a loose connection, use a wrench to tighten the nuts and bolts securing the faucet.
- Replace Worn Washers: If the leak is coming from the spout or base, try replacing the washers or seals without fully disassembling the faucet.
Identifying the Leak Source
- Leak from the Faucet Body: If water is leaking from the faucet itself, the valve or cartridge may need to be replaced.
- Leak from the Handles: Leaks from the handles are usually caused by damaged seals or washers.
Preventative Measures
- Keep Parts Clean and Lubricated: Clean your faucet parts regularly and lubricate them to avoid future leaks.
How to Repair a Leaking Mobile Home Kitchen Faucet Handle
Leaking faucet handles are common in both single-handle and two-handle faucets. The problem is usually caused by worn-out seals or loose connections.
Common Causes of Leaks in Faucet Handles
- Worn-Out O-Rings: O-rings create a seal around the faucet handle. If these wear out, water can leak from the handle.
- Loose Handle Components: Sometimes, a loose screw or worn component can lead to a leak.
Steps to Fix a Leaking Mobile Home Kitchen Faucet Handle
- Disassemble the Handle: Use a screwdriver or Allen wrench to remove the handle from the faucet.
- Inspect for Damaged Parts: Check the O-rings or washers inside the handle. Replace them if necessary.
- Reassemble and Test: Once you’ve replaced the damaged parts, reassemble the faucet and check for leaks.
How to Repair a Leaking Mobile Home Kitchen Faucet Delta Model
Delta faucets are a common brand used in mobile homes. If your Delta faucet is leaking, you may need to replace the cartridge or seals.
Step-by-Step Repair for a Delta Kitchen Faucet
- Remove the Handle: Use an Allen wrench to remove the handle.
- Inspect the Cartridge: The cartridge controls the flow of water. If it’s damaged or worn out, replace it.
- Replace O-Rings or Seals: If the O-rings or seals are worn out, replace them.
- Reassemble and Test: After replacing the damaged parts, reassemble the faucet and test it for leaks.
How to Repair a Leaking Mobile Home Kitchen Faucet Without a Complete Replacement
In many cases, you can repair a leaking faucet without completely replacing it, which is both cost-effective and convenient.
Why Replacing Parts is Better than Replacing the Entire Faucet
- Cost-Effectiveness: Repairing the faucet is far cheaper than purchasing and installing a new one.
- Ease of Repair: Most leaks can be fixed by simply replacing washers, seals, or O-rings.
Steps for Simple Repairs
- Check for Loose Parts: Tighten any loose connections or bolts.
- Replace Worn Seals: Replace any worn seals or O-rings inside the faucet.
- Reassemble and Test: Once repaired, reassemble the faucet and check for leaks.
How to Fix Leaky Faucet Single Handle (From Neck or Base)
If you notice a leak coming from the neck or base of your single-handle faucet, the issue may lie with the seals or O-rings.
Repairing Leaks from the Faucet Neck
- Remove the Faucet Handle: Use an Allen wrench to remove the handle.
- Inspect the Neck: Check for damage to the neck and replace any worn seals.
- Reassemble and Test: Once repairs are complete, reassemble the faucet and test it for leaks.
How to Repair a Leaking Mobile Home Kitchen Faucet Shower Combo
Many mobile homes have a faucet-shower combo. These units can develop leaks due to a variety of issues.
Step-by-Step Instructions for Repairing a Shower Combo
- Turn Off Water Supply: Shut off the water supply and disassemble the faucet handle.
- Check the Diverter Valve: Inspect the diverter valve for blockages or damage.
- Replace Faulty Parts: If any parts are damaged, replace them.
- Reassemble and Test: Once the repair is complete, reassemble and check for leaks.
FAQs
What causes a single handle kitchen faucet to leak from the neck?
A single-handle faucet typically leaks from the neck due to faulty seals, worn O-rings, or a damaged cartridge. Over time, these parts can wear out, causing water to leak around the base or neck of the faucet. In some cases, mineral buildup or corrosion around the faucet neck can also contribute to leaks.
How do you fix a leaking kitchen faucet with two handles?
To fix a leaking two-handle kitchen faucet, follow these steps:
- Turn off the water supply and open the faucet to relieve pressure.
- Remove the handles: Unscrew the handle screws and pull the handles off.
- Remove the valve stems using a wrench.
- Replace the washers or O-rings: Inspect and replace any worn washers or seals in the valve seats or stems.
- Reassemble the faucet and test for leaks.
Can I fix a leaking kitchen faucet without turning off the water supply?
It’s always recommended to turn off the water supply before repairing a leaky faucet. Doing so prevents water from flowing during the repair process, making it easier and safer to work. If you attempt a repair without turning off the water, you risk causing water damage and making the repair more difficult.
How long will it take to repair a leaking faucet?
The time required to repair a leaking faucet depends on the type of faucet and the extent of the damage. Generally, fixing a leaky faucet can take anywhere from 30 minutes to 1 hour. If you’re replacing parts like washers, seals, or cartridges, the job will be quicker, but more complex issues may take longer.
What are the most common issues with Delta kitchen faucets?
The most common issues with Delta kitchen faucets include:
- Leaking around the base or handle: Often caused by worn-out seals or O-rings.
- Low water pressure: A build-up of mineral deposits can clog the aerator or cartridge.
- Dripping after the faucet is turned off: This is typically due to a worn-out or damaged valve or cartridge.
- Corrosion or hard water stains: Build-up can occur over time, leading to leaks or difficulty turning the faucet handle.
Is it better to replace a leaky mobile home kitchen faucet or repair it?
In most cases, repairing a leaky faucet is more cost-effective than replacing it. If the faucet parts are still available and in good condition, you can usually fix the issue by replacing washers, seals, or the cartridge. However, if the faucet is old or severely damaged, replacement might be the better option, especially if repair parts are difficult to find or expensive.
How do I fix a leaky faucet quickly without professional help?
To fix a leaky faucet quickly, follow these steps:
- Identify the source of the leak (spout, base, or handle).
- Turn off the water supply to prevent flooding.
- Remove the handle and check for damaged parts such as washers, O-rings, or cartridges.
- Replace the damaged parts with new ones.
- Reassemble the faucet and test it for leaks.
For minor leaks, simply tightening loose nuts or bolts may also be an effective quick fix.
Conclusion
Fixing a leaking mobile home kitchen faucet doesn’t have to be a difficult task. By following the steps outlined in this guide, you can easily address common faucet issues, save money on professional repairs, and prevent further damage. Regular maintenance and prompt repairs will keep your faucet in top shape for years to come.
Call to Action (CTA)
Have you repaired a leaky faucet before? Share your experience or ask any questions in the comments below! Don’t forget to download our free faucet repair checklist for all the tools and steps you need to keep your faucet in tip-top condition!