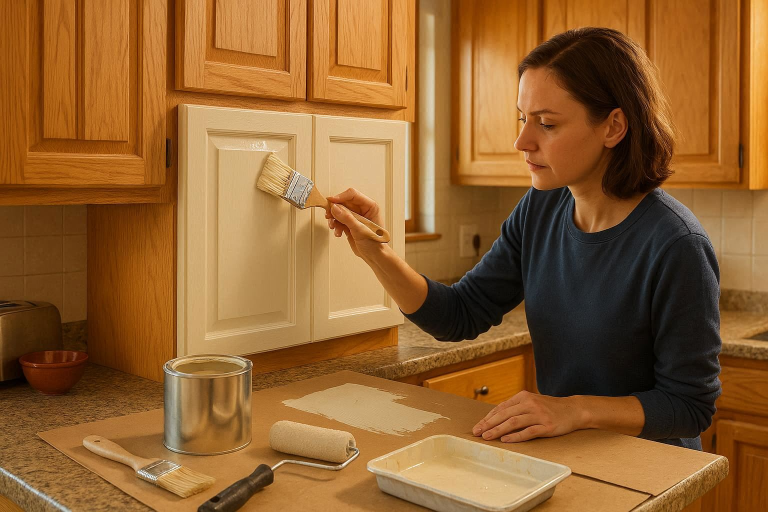
Are your kitchen cabinets looking a little outdated or worn out? Maybe you’re considering a renovation but don’t have the budget for new cabinets. Well, painting unfinished kitchen cabinets is an excellent option! Not only is it a cost-effective way to upgrade your kitchen, but it also allows you to customize your space and breathe new life into old cabinetry. Whether you’re tackling this project as a DIY enthusiast or just looking for a budget-friendly way to revamp your kitchen, painting your unfinished cabinets is a great solution.
In this guide, we’ll walk you through everything you need to know about how to paint unfinished kitchen cabinets, from preparation to choosing the right primer, color, and finish. By the end of this post, you’ll have all the information to achieve a professional-looking finish without breaking the bank.
Why You Should Paint Unfinished Kitchen Cabinets
A Cost-Effective Kitchen Upgrade
If you’re working on a tight budget, replacing kitchen cabinets can be expensive. New cabinets alone can cost thousands of dollars, and then you have Organization Ideas for Kitchen and Living Room the installation fees to consider. But painting unfinished cabinets is a fraction of the cost. With just some basic materials and a little time, you can give your kitchen a fresh, updated look.
Personalized Look
One of the best things about painting your unfinished kitchen cabinets is the ability to create a completely customized look. You can choose your favorite color, finish, and style to suit your kitchen’s vibe. Whether you’re aiming for a clean, white minimalist look or a bold, black statement, the options are endless.
Increased Home Value
Painting your kitchen cabinets can also increase the overall value of your home. A kitchen upgrade is one of the most effective ways to boost your home’s appeal to potential buyers. Plus, a fresh coat of paint can make your kitchen look brand new without the need for a major remodel.
How to Paint Unfinished Cabinets: Essential Preparation Steps
Before you dive into the painting process, it’s crucial to prepare your cabinets properly. A well-prepared surface will ensure that the paint adheres smoothly and lasts for years.
Cleaning the Surfaces
Start by thoroughly cleaning your cabinets. Unfinished cabinets often accumulate dust, grease, and grime, so give them a good scrub. Use a degreaser or a mild soap solution and a rag or sponge to wipe down the surfaces. Be sure to let the cabinets dry completely before moving on to the next step.
Do You Have to Sand Unfinished Cabinets Before Painting?
Yes! Sanding is a must. Even though unfinished wood may look smooth, it has a rough texture that needs to be smoothed out before painting. Sanding ensures better paint adhesion and helps to eliminate any imperfections.
Choosing the Right Sandpaper Grit
For unfinished cabinets, you should start with medium-grit sandpaper (around 120-grit) to smooth out the surface. If you’re dealing with a rougher texture, you may need to use a coarser grit first (80-grit). Finish up with a finer grit (180-grit) to create a smooth, even surface for painting.
Best Primer for Unfinished Cabinets
A high-quality primer is essential for achieving a smooth and long-lasting finish. It helps the paint adhere to the surface and seals any stains or wood tannins that might bleed through.
Why Primer is Crucial
Primer not only enhances paint adhesion but also ensures that the wood’s natural grain doesn’t show through the final coat of paint. It can also help to block any stains that might seep through, especially if you’re working with oak or pine, which are notorious for tannin stains.
Top Primers for Unfinished Cabinets
- Shellac-based Primer: This is the best option for covering tannin stains, especially in woods like oak and pine. It seals the wood and prevents the natural oils from affecting the paint.
- Latex-based Primer: Ideal for general use and easier cleanup, latex-based primers are a great all-around choice for unfinished cabinets. They’re quick-drying and provide an even surface for paint.
How to Apply Primer Correctly
Whether you’re using a brush or a sprayer, apply a thin, even coat of primer. Be sure to allow it to dry fully between coats (refer to the manufacturer’s instructions). If you’re using a sprayer, keep the nozzle at a consistent distance from the surface to avoid drips.
How to Paint Unfinished Cabinets with a Sprayer
While brushes and rollers can get the job done, using a sprayer gives you a smooth, professional finish. If you’re new to sprayers, don’t worry! Here’s a step-by-step guide:
Why Use a Sprayer?
A sprayer helps you achieve a flawless finish, especially on intricate areas like cabinet doors and edges. It eliminates the brush strokes and roller marks that can sometimes show up when painting cabinets.
Step-by-Step Guide on How to Paint Unfinished Cabinets with a Sprayer
- Choose the Right Sprayer: There are two main types of sprayers: Airless and HVLP (High Volume Low Pressure). For cabinets, an HVLP sprayer is often the best option because it gives you better control and a finer finish.
- Set Up the Sprayer: Follow the manufacturer’s instructions to set up the sprayer and ensure that the paint is mixed correctly. Thin the paint slightly if necessary, especially if you’re using a thicker paint.
- Spraying Techniques: Hold the sprayer about 6–8 inches from the cabinet surface, and move the sprayer in smooth, consistent strokes. Avoid staying in one spot too long to prevent drips. If you do see drips, gently smooth them out with a brush.
- Safety Precautions: Wear protective gear such as a mask, goggles, and gloves. Make sure to work in a well-ventilated area or outside if possible. Cover surrounding surfaces with drop cloths to protect them from overspray.
Painting Kitchen Cabinets for Beginners: A Simple Guide
If you’re a beginner at DIY projects, painting kitchen cabinets might seem intimidating, but it’s easier than it looks. Here are some basic tips to help you get started.
Choosing Your Paint
When it comes to kitchen cabinets, the best paint options are oil-based and latex-based paints. Oil-based paints are durable and provide a hard finish, but they have a longer drying time and a stronger odor. Latex-based paints, on the other hand, dry faster and are easier to clean, but they may not be as durable.
Tools You’ll Need
- Brushes and rollers (for smaller areas or touch-ups)
- HVLP sprayer (for a smooth finish)
- Painter’s tape to mask off areas you don’t want to paint
- Drop cloths to protect your floors and countertops
- Sandpaper and cleaning materials
Basic Tips for Beginners
- Always test your paint on a small area before starting.
- Be patient and allow each coat of paint to dry fully before applying the next.
- For a smoother finish, lightly sand between coats of paint with fine-grit sandpaper.
Painting Unfinished Cabinets: Choosing the Right Color and Finish
Now comes the fun part—choosing your color and finish! The color and finish you choose will define the look of your kitchen.
Popular Colors for Unfinished Kitchen Cabinets
- How to Paint Unfinished Kitchen Cabinets White: White cabinets can brighten up a kitchen and give it a clean, modern look. To get that perfect white finish, you may need a few coats of paint, so be patient!
- How to Paint Unfinished Kitchen Cabinets Black: Black cabinets can add sophistication and elegance to your kitchen. Just make sure to choose a satin or semi-gloss finish to avoid an overly matte look.
Matte, Satin, or Glossy?
The finish of your paint will affect the overall appearance of your cabinets. Here’s a breakdown:
- Matte Finish: Best for hiding imperfections but can be harder to clean.
- Satin Finish: Offers a soft sheen, is easy to clean, and is perfect for high-traffic areas like kitchens.
- Glossy Finish: Provides a high-shine finish that’s durable and easy to wipe clean but shows imperfections more easily.
Painting Unfinished Cabinets from Lowe’s and Home Depot
Both Lowe’s and Home Depot offer a wide selection of products for painting cabinets. Here’s a breakdown:
Choosing the Right Paint Products from Lowe’s
Lowe’s carries several high-quality cabinet paints like Valspar Cabinet Enamel and HGTV Home by Sherwin-Williams. These paints are designed to offer a smooth, durable finish that’s perfect for cabinets.
Painting Unfinished Cabinets from Home Depot
Home Depot also offers a variety of options, including Behr Premium Plus Ultra and Glidden Premium paints. These paints are well-known for their durability and easy application.
Lowe’s vs. Home Depot: A Comparison
When choosing between Lowe’s and Home Depot, consider factors like cost, paint quality, and customer service. Both stores offer excellent cabinet paint options, so it ultimately comes down to personal preference.
Do You Paint the Inside of Unfinished Cabinets?
Many people wonder whether it’s necessary to paint the inside of their cabinets. While it’s not required, painting the inside can give your kitchen a more polished look.
When and Why to Paint the Inside of Cabinets
Painting the inside of your cabinets can protect the wood from moisture and grime. It also gives the entire kitchen a cohesive, finished look.
How to Paint the Inside of Cabinets
Use a smaller brush or a mini roller to paint the insides of your cabinets. Be sure to let the paint dry completely before replacing shelves or placing items inside.
Special Considerations for Painting Unfinished Oak Cabinets
Oak cabinets can be challenging to paint due to their porous texture and tannin stains, but with the right preparation, they can look amazing.
How to Prepare and Paint Unfinished Oak Cabinets
Before painting, use a shellac-based primer to prevent tannin bleed-through. This will help seal the wood and create an even surface for the paint.
Common Mistakes to Avoid When Painting Unfinished Kitchen Cabinets
To ensure your project goes smoothly, here are a few mistakes to avoid:
- Skipping Sanding and Priming: These are essential steps to ensure smooth, durable paint adhesion.
- Using the Wrong Paint: Make sure to use a paint designed for cabinets for the best results.
- Rushing the Drying Process: Always allow each coat to dry thoroughly before applying another.
FAQs
Conclusion
Painting unfinished kitchen cabinets is an easy, cost-effective way to upgrade your kitchen. By following the steps outlined in this guide, you can achieve a professional-looking finish that will last for years.
Call to Action (CTA)
Ready to tackle your cabinet painting project? Download our free checklist to ensure you have everything you need, and be sure to subscribe for more DIY home improvement tips!

