You’ve searched for the perfect sealant because you know a leaky, moldy sink is more than just an eyesore—it’s a disaster waiting to happen. Water damage, cabinet rot, and persistent black mildew are the costly results of choosing the wrong product.
The secret to a long-lasting, watertight kitchen sink seal is simple: you need the right product and the right technique.
This guide, based on professional plumbing standards, will cut through the confusion of caulks and sealants to give you the definitive answer on what silicone to use for your kitchen sink, ensuring a durable, flexible, and perfectly sealed installation.
The Ultimate Answer: What Silicone to Use for Your Kitchen Sink?
The simplest and most direct answer is:
You must use a 100% pure silicone sealant specifically labeled as “Kitchen & Bath” or “Sanitary.”
This type of silicone polymer offers superior performance over cheaper alternatives, which is non-negotiable in the high-moisture, high-traffic environment of a kitchen sink. It provides the flexible seal necessary to withstand the constant expansion and contraction that happens with hot water use.
Why 100% Silicone Sealant is Your Only Real Choice
Many people mistakenly grab an all-purpose caulk. However, in an area constantly exposed to water, food particles, cleaning chemicals, and temperature Cleaning Guide for Home & Kitchen swings, an inferior product will fail quickly.
Here is why 100% pure silicone is the industry standard for kitchen sinks:
Flexibility and Durability
Kitchen sinks and countertops (especially stone and wood) are constantly moving. This movement is subtle, caused by temperature fluctuations (hot water) and humidity.
-
100% Silicone is rubber-like and highly elastic. It can stretch and compress without cracking or peeling, maintaining a robust, leak-proof seal for 10-20 years.
-
Acrylic or Latex Caulk is rigid. When movement occurs, it cracks, creating tiny, invisible pathways for water to seep into the cabinet structure below.
Waterproofing and Mold Resistance
The sink-to-counter joint is the prime location for water pooling and mold growth.
-
Pure Silicone is inherently waterproof, preventing moisture penetration right at the source.
-
The “Kitchen & Bath” designation means the sealant contains powerful mildew-resistant additives to inhibit the growth of black mold, which thrives on traditional, porous caulk.
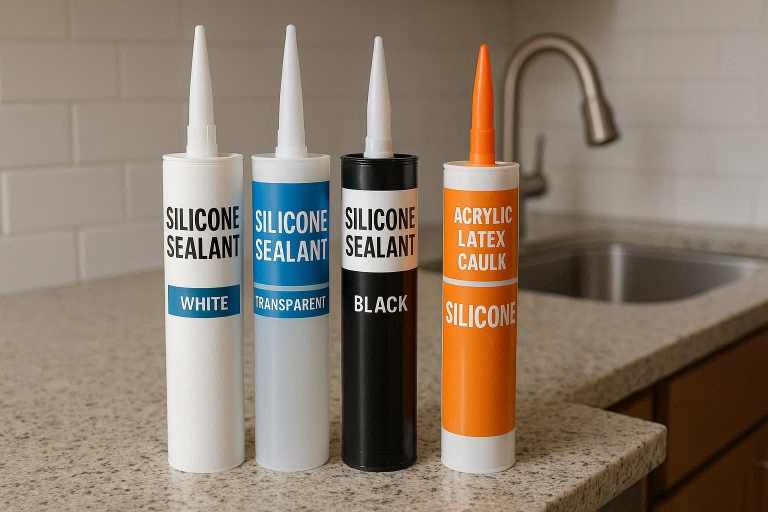
Silicone vs. Caulk: Understanding the Difference
The terms “caulk” and “sealant” are often used interchangeably, but they are not the same. Silicone sealant is a type of caulk, but most standard caulk is acrylic or latex-based.
| Feature | 100% Silicone Sealant | Acrylic/Latex Caulk | Siliconized Acrylic Caulk |
| Composition | Silicone Polymer | Acrylic/Latex | Hybrid (Acrylic + Silicone) |
| Elasticity/Flexibility | High (Excellent for movement) | Low (Rigid) | Medium |
| Water Resistance | Excellent (Fully waterproof) | Poor/Moderate | Good |
| Mold/Mildew Resistance | Excellent (Sanitary Grade) | Poor | Good |
| Longevity | 10–20+ Years | 1–3 Years | 5–10 Years |
| Paintable | No | Yes | Most are Yes |
| Best Use | Kitchen Sinks, Tubs, Showers, Wet Areas | Low-Moisture Areas, Gaps to be Painted | General Purpose (Better than standard caulk) |
For your kitchen sink, always prioritize the superior waterproofing and flexibility of 100% silicone.
Choosing the Right Silicone Chemistry: Acetoxy vs. Neutral Cure
Once you’ve decided on 100% silicone, you need to consider the curing type. This affects the odor, cure time, and—critically—material compatibility.
Acetoxy-Cure Silicone: The Pros and Cons
This is the most common type and is identified by its strong, distinctive vinegar-like smell during curing.
-
Pros: Fast drying, readily available, often lower cost.
-
Cons: Releases acetic acid vapor, which can potentially corrode or discolor certain metal finishes (like stainless steel faucets) or stain sensitive countertop materials such as natural stone (granite, marble, quartz).
-
Best For: Ceramic or porcelain surfaces where cost is the main concern, but neutral-cure is still generally safer.
Neutral-Cure Silicone: The Best All-Around Solution
Neutral-cure silicone releases an alcohol or ammonia vapor as it cures, giving it a much milder, less offensive odor.
-
Pros: Safe for all materials—does not stain or corrode metals, plastic, or porous granite and quartz countertops. Better adhesion to non-porous surfaces. Less odor, making it ideal for a kitchen environment.
-
Cons: Takes slightly longer to cure (up to 24 hours for full strength).
-
Best For: Undermount sinks, all natural stone countertops, metal sinks, and plumbing fixtures. This is the recommended choice for professional results.
Pro Tip: When sealing sinks in direct contact with natural stone or sensitive composite materials, a neutral-cure, non-staining, and food-safe silicone is essential to prevent discoloration of the stone over time.
Top Silicone Brands Recommended for Kitchen Sinks
When shopping, look for these features and brands known for their high-temperature resistance and reliable flexible seal:
-
GE Silicone 2+ Kitchen & Bath: A highly popular, fast-drying 100% silicone known for excellent mold resistance.
-
Gorilla 100% Silicone Sealant: Reliable, clear, and durable—a great option for DIY applications.
-
DAP Kwik Seal Ultra/Silicone Max: Products specifically designed for kitchen and bath, offering strong anti-mildew and waterproof properties.
-
Loctite 100% Silicone: A trusted brand often recommended for its strong, long-lasting adhesive properties.
Understanding Kitchen Sink Sealing Points
The specific application of the silicone sealant depends on your sink type. Water needs to be sealed out at three main areas.
Sealing the Sink-to-Countertop Joint (Top-Mount Sinks)
A top-mount (or drop-in) sink sits over the countertop. The small gap between the sink rim and the counter is the primary sealing point.
-
The goal here is a tidy, continuous bead of silicone to create a flawless waterproof barrier.
-
This seal prevents spills, splashes, and condensation from running under the lip and into your cabinets.
Sealing Undermount Sinks: More Than Just a Seal
Undermount sinks are mounted underneath the countertop. The sealant here performs a dual role:
-
Water Barrier: Sealing the critical joint between the underside of the counter and the sink rim.
-
Adhesive: For many installations, the silicone acts as a secondary structural adhesive, helping to support the sink’s weight alongside mounting clips.
-
For this specific application, a silicone with strong adhesive properties or a purpose-made epoxy is often required for the initial mounting, with a separate bead of silicone applied later for the primary waterproof barrier.
-
The Faucet Base and Drain Assembly
Don’t forget the other water entry points.
-
Faucet Base: A thin bead of silicone applied under the faucet base plate seals the gap where the faucet meets the counter, preventing water from dripping into the cabinet below.
-
Drain Assembly: While a product like plumber’s putty is traditionally used for the underside of the drain flange (the part sitting inside the sink bowl), a silicone polymer sealant is superior for modern, watertight seals around garbage disposal flanges and drain connections to the tailpiece.
Expert Application: A Step-by-Step Guide to a Perfect Silicone Seal
Applying silicone is simple, but the prep work is what truly determines a long-lasting seal. Take your time—this is the most actionable step of the entire process.
Step 1: Remove the Old Sealant and Clean Thoroughly
The most common mistake is applying new silicone over old material. New silicone will not adhere properly to old caulk or dirty surfaces.
-
Use a utility knife or caulk removal tool to scrape away all the existing silicone caulk.
-
Crucially: Use a specialized caulk remover product or a cloth soaked in rubbing alcohol or acetone to remove all lingering residue, oils, and soap scum.
-
Allow the area to dry completely. A clean, bone-dry surface is necessary for proper adhesion.
Step 2: Surface Preparation: Clean, Dry, and Tape
Preparation is 90% of a professional-looking job.
-
Taping: Apply painter’s tape (or masking tape) along both sides of the joint—on the sink and the countertop. The gap between the tape strips defines the width and shape of your final silicone bead. This guarantees a crisp, straight line and makes clean-up almost effortless.
-
Ensure the surface is 100% dry. Use a hairdryer if necessary.
Step 3: Loading the Caulking Gun and Cutting the Tip
-
Insert the cartridge into a caulking gun.
-
Cut the nozzle tip at a 45-degree angle. The opening should be slightly smaller than the bead you intend to apply—around $1/8$ to $3/16$ of an inch. A smaller hole gives you more control.
Step 4: Applying the Perfect Bead
-
Start in an inconspicuous area.
-
Hold the gun at a 45-degree angle, keeping the nozzle tip resting slightly into the joint.
-
Apply continuous, even pressure to the trigger while moving the gun at a slow, consistent speed.
-
The goal is to lay down a single, unbroken bead that fills the joint completely.
Step 5: The Tooling Process: Smoothing the Seal
Tooling shapes the sealant, pushing it firmly into the joint to ensure a watertight bond. You must tool the bead immediately after application, before the silicone begins to cure.
-
The Wet Finger Technique: Dip your index finger (or a designated caulk-tooling tool) into a cup of water or a finishing solution.
-
Gently run your finger/tool along the entire length of the bead, applying just enough pressure to smooth the material and remove excess.
-
Re-wet your finger/tool as needed to maintain a smooth glide.
Step 6: Curing Time and Final Cleanup
-
Remove the Tape: Immediately after tooling and before the sealant “skins over,” carefully peel away the painter’s tape. Pulling the tape off now will leave you with a perfectly clean, sharp line.
-
Cure Time: Check your product label, but most pure silicone sealants require 24 hours before being exposed to water. Fast-cure formulas may be water-ready sooner, but waiting the full 24 hours is the safest bet to ensure a permanent bond.
Common Silicone Sealing Mistakes to Avoid
Even with the best product, improper technique can lead to premature failure. Avoid these common blunders when working with kitchen-specific silicone.
-
Skipping Surface Prep: Applying new silicone over mold, dirt, or old residue is the number one cause of seal failure. The silicone sealant will not adhere to anything but a perfectly clean surface.
-
The Over-Application Error: A huge, thick bead is not better. It looks messy, is prone to trapping dirt, and can peel faster. Use the tape method to ensure a small, uniform, professional-looking bead.
-
Using the Sink Too Soon: You must allow the silicone polymer to cure fully. Exposing it to water or cleaning chemicals before the recommended cure time (usually 24 hours) will severely compromise the seal’s lifespan and waterproofing.
-
Ignoring Compatibility with Countertop Material: As discussed, using an acetoxy-cure silicone on natural stone countertops (like granite or marble) can lead to permanent staining or discoloration. Always opt for a neutral-cure product for these sensitive materials.
Tips for Maintaining Your Kitchen Sink Silicone Seal
Maintenance is key to making your durable, mildew-resistant silicone last the full 15–20 years.
-
Regular Cleaning: Wipe down the sealed area regularly to prevent standing water and soap scum build-up.
-
Avoid Harsh Chemicals: Do not use abrasive cleaners or concentrated bleach directly on the silicone, as they can degrade the anti-mold additives over time. Use gentle, non-abrasive household cleaners.
-
Check for Cracks: Periodically inspect the seal for any signs of cracking, peeling, or persistent black mold. Addressing small issues quickly will prevent costly water damage.
FAQ:
How long does silicone caulk last on a kitchen sink?
A properly applied 100% silicone sealant labeled for Kitchen & Bath can last 15 to 20 years or more, thanks to its superior elasticity and mold-resistant formulation.
Can I use bathroom silicone on a kitchen sink?
Yes, most silicone products labeled for ‘Bathroom’ are also appropriate for the kitchen. They share the same anti-mildew and waterproof properties. However, a product specifically labeled ‘Kitchen & Bath’ often carries an extra assurance of being food-safe and resistant to common kitchen chemicals.
Is clear or white silicone better for a kitchen sink?
This is a cosmetic choice. Clear silicone is less noticeable and generally works well with all colors, while white silicone provides a crisp, clean line against white sinks or counters. Functionally, they are identical, assuming they are the same product line and cure type.
How long after applying silicone can I use my kitchen sink?
Always defer to the manufacturer’s instructions, but most pure silicone sealants require 24 hours to fully cure before they can be exposed to running water, even if they are ‘tack-free’ much sooner.
What is the difference between silicone and siliconized caulk?
Silicone is a 100% pure rubber-like polymer. Siliconized caulk is a hybrid product—usually an acrylic or latex caulk that has a small amount of silicone added for improved flexibility and water resistance. For a kitchen sink, the superior performance of 100% silicone is highly recommended.
Conclusion:
Choosing the correct product for your kitchen sink doesn’t have to be complicated. By selecting a 100% silicone sealant—ideally a neutral-cure, Kitchen & Bath formula—you are investing in the strongest, most flexible, and most mildew-resistant seal available.
Remember that a perfect seal is achieved through meticulous preparation and a steady application hand. A small investment of time and a slightly higher cost for the right product will save you significant money and headaches down the road.