White kitchen cabinets are the cornerstone of a bright, modern, and timeless kitchen design. They create an illusion of space and reflect light beautifully, instantly lifting the entire room.
However, they are also a magnet for everyday grime. Fingerprints, grease splatter, and food stains show up immediately against a pristine white backdrop.
Keeping them sparkling white can feel like a constant battle, but it doesn’t have to be.
The secret is knowing exactly what to use to clean white kitchen cabinets—and, more importantly, what to avoid—to preserve their flawless finish.
This guide provides the simple, safe, and actionable methods preferred by experts for every type of cleaning challenge, from daily wipe-downs to tackling stubborn yellowing.
Why White Cabinets Require a Special Cleaning Approach
The brightness of white cabinets is their biggest asset and their main vulnerability. Unlike darker colors that camouflage dust and minor splatters, white reveals every speck of dirt.
Furthermore, white kitchen cabinets often have a painted or lacquered finish designed for durability, but these finishes are sensitive to Cleaning Guide for Home & Kitchen harsh chemicals and abrasive scrubbing.
Using the wrong cleaning solution, like highly acidic or caustic products, can cause irreversible damage:
-
It can strip the protective sealant or topcoat.
-
It may dull the paint or cause chalkiness.
-
It can lead to premature yellowing or discoloration.
The safest, most effective approach relies on gentle, consistent cleaning with solutions that cut through kitchen grease without compromising the cabinet finish.
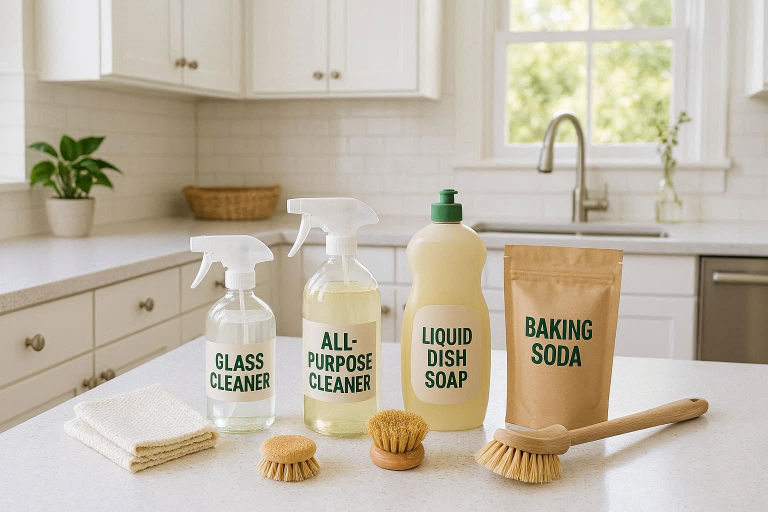
Essential Supplies and Tools: What You’ll Need
Before you begin your cleaning routine, gather these fundamental tools. These items are safe, non-abrasive, and will be used with every recommended cleaning solution in this guide.
-
Mild Dish Soap (e.g., Dawn): The ultimate grease-cutter and the base for your primary cleaning mix.
-
White Distilled Vinegar: A natural degreaser and mild disinfectant.
-
Baking Soda: A gentle abrasive for creating a baking soda paste to lift tough stains.
-
Warm Water: Used for dilution and rinsing.
-
Soft-Bristled Toothbrush: Essential for cleaning around cabinet hardware and in decorative grooves.
-
Spray Bottle: For mixing and applying diluted solutions.
The Soft Side of Cleaning: Why Microfiber Cloths are Key
The type of rag or towel you use is just as important as the cleaner.
You must use non-abrasive materials to protect the finish. Microfiber cloths are the gold standard for cleaning white kitchen cabinets.
They effectively pick up dirt and grease, glide over the surface, and reduce the risk of scratching, leaving a streak-free shine. Use one cloth for applying the cleaning solution and a separate, dry one for buffing.
The Best DIY Cleaning Solutions for White Cabinets
You don’t need expensive, specialized cleaners. The best products for maintaining white cabinets are simple, mild, and likely already in your pantry.
The Go-To Gentle Solution: Mild Dish Soap and Warm Water
For routine maintenance and general dirt and fingerprints, a mild dish soap solution is your best friend. It’s effective, safe, and gentle enough for all finishes, including painted or laminate cabinets.
How to Mix and Use:
-
Combine about one tablespoon of mild dish soap with one gallon of warm water in a bucket or large bowl.
-
Dip your microfiber cloth into the solution and wring it out thoroughly. The cloth should be damp, not soaking wet.
-
Wipe down the cabinet surfaces, focusing on handles and heavily touched areas.
-
Follow up with a clean cloth dampened with plain warm water to rinse any soap residue.
-
Immediately dry the area with a fresh, dry microfiber cloth to prevent water spots.
The Natural Degreaser: Diluted White Vinegar Spray
For areas with heavier grease buildup—especially near the stove—or a deeper periodic clean, a diluted vinegar solution is highly effective. Vinegar naturally breaks down grease.
How to Mix and Use:
-
Mix equal parts white vinegar and warm water in your spray bottle (a 1:1 ratio).
-
Do not spray directly onto the cabinet surface. Instead, lightly spritz your microfiber cloth.
-
Wipe the greasy areas. The mixture will cut through the sticky residue.
-
Rinse with a cloth dampened with plain water and dry immediately.
Expert Tip: Always test a vinegar solution on an inconspicuous spot first, especially on older or less durable painted cabinets, to ensure it doesn’t affect the finish.
The Power Scrubber: Baking Soda Paste for Tough Stains
When you encounter stubborn marks, like coffee splatters, sauce stains, or scuff marks, a baking soda paste provides the necessary gentle abrasive power.
How to Mix and Use:
-
Mix baking soda with just enough water to create a thick, spreadable paste (e.g., 2 parts baking soda to 1 part water).
-
Apply the paste directly to the tough stains using your finger or a soft cloth.
-
Let the paste sit on the stain for 5 to 10 minutes to allow the baking soda to work.
-
Gently rub the area with a damp microfiber cloth or a soft-bristled toothbrush.
-
Rinse thoroughly and dry.
Step-by-Step Guide: How to Clean Your White Kitchen Cabinets
A systematic approach ensures you clean your cabinets safely and effectively, avoiding moisture damage.
The Initial Prep: Dusting and Spot Treatment
Start every cleaning session with dry dusting to remove loose particles. This prevents you from grinding dirt into the finish during the wet-cleaning phase.
-
Use a dry, clean microfiber cloth to wipe down all surfaces.
-
For splatters and spills, address them immediately. The longer they sit, the harder the stain will be to remove.
Deep Cleaning the Cabinet Surfaces
Work in small sections, from top to bottom, to ensure you don’t miss any areas.
-
Dip your cloth in the mild dish soap and warm water solution, and wring it out until it’s just damp.
-
Wipe the front of the cabinet door, following the grain of wood cabinets or the direction of the finish.
-
Apply gentle, consistent pressure—avoid aggressive scrubbing.
Cleaning Knobs, Pulls, and Hard-to-Reach Grooves (Hardware)
Grease buildup often accumulates around handles and in decorative crevices (like beadboard or shaker-style edges).
-
Use your soft-bristled toothbrush dipped in the cleaning solution to gently scrub the edges, corners, and around all cabinet hardware.
-
Wipe the hardware separately, as metal can sometimes be reactive to the acid in vinegar.
Rinse and Dry: A Crucial Final Step
Excess moisture is the number one cause of long-term damage (swelling, warping, and peeling) to kitchen cabinets. Never skip this part of the process.
-
Use a clean cloth dampened with plain water to wipe away all traces of the soap or baking soda paste residue.
-
Immediately follow with a dry, fresh microfiber cloth to absorb all moisture, leaving the surface completely dry.
Tackling the Toughest Problems on White Cabinets
Specific problems require targeted solutions. Knowing what to use to clean white kitchen cabinets of different types of stains is the key to maintaining their pristine look.
How to Remove Stubborn Grease Buildup
Heavy, sticky grease requires a strong degreaser, but it must still be gentle on the finish.
-
Method 1 (Best): Apply the diluted white vinegar solution to a cloth and let it sit on the greasy area for a minute to break down the oil before gently wiping.
-
Method 2 (Alternative): Use a commercial cabinet-safe degreaser spray, but always ensure it’s pH-neutral or specifically formulated for finished wood/paint.
Special Treatment for Food and Ink Stains
For bright stains like tomato sauce, red wine, or permanent marker, act quickly.
| Stain Type | Recommended Solution | Application Method |
| Food Stains (Sauce, Coffee) | Baking Soda Paste | Apply paste, let sit 5 minutes, gently scrub with a damp cloth. |
| Ink/Marker | Rubbing alcohol (very sparingly) or a baking soda paste with a drop of lemon juice (test first). | Apply a tiny amount to a cotton swab. Dab the stain, do not rub. Wipe clean immediately. |
| Scuff Marks | Pencil eraser (white, non-abrasive kind) | Gently rub the mark until it disappears. |
Dealing with Yellowing and Discoloration
White cabinets can develop yellowing over time, often due to grease, cooking oils, cigarette smoke, or UV exposure (direct sunlight).
-
Deep Clean: Start with a thorough cleaning using the diluted white vinegar spray to remove all surface grease.
-
Baking Soda Brightening: For persistent yellow spots, apply a slightly thicker baking soda paste and allow it to sit for up to 15 minutes before gently rinsing and drying.
-
Prevention: Ensure you use your range hood/exhaust fan while cooking to minimize airborne grease that causes discoloration.
What to AVOID: Harsh Cleaners and Materials That Damage White Finishes
Using the wrong product can permanently ruin your cabinet finish, necessitating expensive repairs or replacements.
The “Magic” of Abrasives: Why to Skip the Magic Eraser
While tempting for tough scuffs, products like the Magic Eraser are melamine foam, which acts like ultra-fine sandpaper.
-
Risk: They can easily remove the gloss, sheen, or protective topcoat of painted cabinets or laminate cabinets, leaving behind a dull, chalky spot that collects dirt even faster.
Use the non-abrasive baking soda paste instead.
Chemicals to Ban: Bleach, Ammonia, and Undiluted Vinegar
The strength of these cleaners is their undoing on delicate surfaces.
| Cleaner | Risk to White Cabinets | Recommended Alternative |
| Chlorine Bleach | Can strip the topcoat, fade paint, and sometimes cause a reverse yellowing effect. | Diluted white vinegar or a professional, cabinet-safe cleaner. |
| Ammonia-Based Cleaners (e.g., Windex) | Can be too harsh, especially on wood finishes, and can break down the paint. | Mild dish soap and warm water. |
| Undiluted Vinegar | The high acidity can etch and dull the cabinet finish over time. | Always use the recommended 1:1 dilution with warm water. |
Pro Tips for Long-Term White Cabinet Maintenance
The key to keeping white cabinets pristine is a regular routine, not infrequent deep-cleaning marathons.
-
Daily Wipe-Down: After cooking, use a damp microfiber cloth to quickly wipe the door/drawer faces nearest the stove and sink where oil and water splatters are most common.
-
Use Your Vent Hood: Always run your exhaust fan while cooking. This is a crucial preventive step against airborne grease and oil that causes grease buildup and yellowing.
-
Protect the Top: If your upper cabinets don’t reach the ceiling, line the cabinet tops with wax paper or parchment paper. This captures the dust and grease that settles there; simply replace the liner instead of scrubbing.
-
Invest in Hardware: If your cabinets don’t have knobs or pulls, consider installing them. Direct contact from hands transfers oils and dirt to the cabinet face, leading to faster grease buildup and discoloration.
Comparison: White Painted Cabinets vs. Laminate vs. Wood
While the DIY solutions are generally safe, understanding your cabinet material helps refine your approach.
| Cabinet Material | Key Characteristic | Cleaning Cautions | Best Cleaning Solution |
| Painted Cabinets (Wood or MDF) | Most common, susceptible to chipping/dulling. | Avoid all abrasives (including Magic Eraser). Minimize moisture exposure. | Mild dish soap and warm water. Use baking soda paste for spot-treating. |
| Laminate Cabinets | Durable, but prone to scratching and water damage at the seams. | Avoid undiluted vinegar and harsh chemicals that can break down the adhesive. Use minimal water. | Mild dish soap and water. Dry immediately. |
| Wood Cabinets (Sealed or Stained) | The finish is the key protective layer. | Be very careful with vinegar, which can dry out the wood finish over time. | Mild dish soap and water, followed by a dedicated wood cabinet polish (optional). |
FAQs
How often should I clean my white kitchen cabinets?
For optimal appearance, a quick wipe-down of high-contact areas (around handles, near the stove) should be done weekly. A thorough deep clean of all surfaces should be performed monthly to prevent grease and grime from setting.
Can I use an all-purpose cleaner on my white cabinets?
Most generic all-purpose cleaners are safe if they are non-abrasive and non-acidic. However, to be certain of protecting your cabinet finish, it is always safer and cheaper to use a highly diluted mild dish soap solution or the gentle white vinegar spray. Always test a small area first.
What causes white cabinets to turn yellow over time?
The most common causes are grease buildup from cooking, nicotine from smoke, and prolonged exposure to UV rays from direct sunlight. The key to preventing yellowing is using your range hood religiously and consistently cleaning the surface grease with a degreasing agent like diluted dish soap or white vinegar.
How do I clean the grease buildup on top of my upper cabinets?
This area accumulates a heavy mix of dust and sticky grease. Use the diluted white vinegar solution or a strong solution of mild dish soap and hot water. Let the cleaner sit for a few minutes to emulsify the grease buildup before wiping. For easier future cleaning, line the tops with wax paper.
Is it safe to use hydrogen peroxide on white cabinets?
Hydrogen peroxide (diluted) can be used as a last resort on very tough stains like red wine, as it has mild bleaching properties. However, it should only be used as a spot treatment, dabbed on with a cotton swab, and immediately rinsed off. Prolonged use or high concentration can damage the cabinet finish.
Final Sparkling Takeaway
Maintaining the bright, beautiful appearance of your white kitchen cabinets comes down to two simple rules: consistency and gentleness.
Know what to use to clean white kitchen cabinets—the power of mild dish soap, warm water, and the occasional baking soda paste—and never sacrifice the integrity of the cabinet finish for a fast clean. By sticking to a soft cloth, avoiding harsh chemicals, and maintaining a regular cleaning schedule, your white cabinets will remain a dazzling centerpiece for years to come.