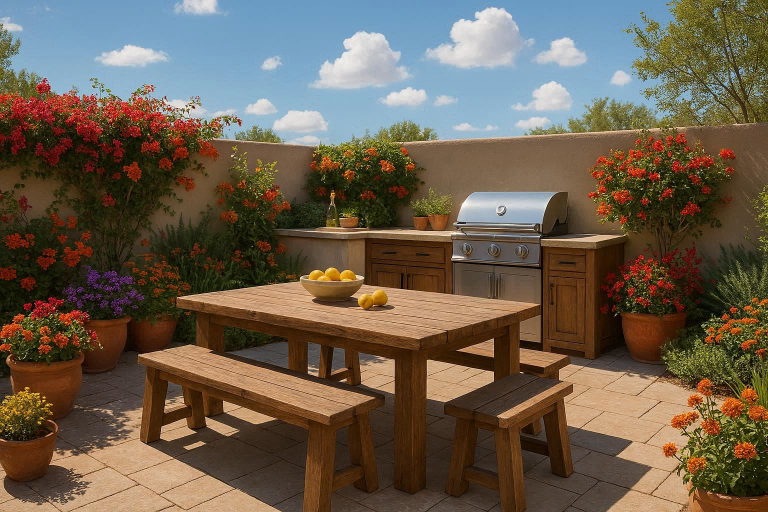
Building an outdoor kitchen is an exciting project that can transform your backyard into an inviting space for family gatherings, barbecues, and al fresco dining. Whether you’re an avid home cook or simply want to create a space to entertain guests, an outdoor kitchen offers both functionality and aesthetic appeal. In this guide, we’ll walk you through the steps involved in building an outdoor kitchen—from planning and layout to construction and finishing touches.
Understanding the Search Intent
The search intent behind “how do you build an outdoor kitchen” typically revolves around gaining clear instructions, understanding the process, and finding helpful tips to create a functional outdoor cooking space. People are looking for step-by-step guides, planning advice, cost estimates, and inspiration to make informed decisions. The goal is not just to build a kitchen but to design one that fits their needs and budget while offering durability and convenience.
Planning Your Outdoor Kitchen
Define Your Goals & Budget
Before starting the build, it’s essential to define your goals for the outdoor kitchen. Think about what you want to achieve: Is it a simple grilling station or a fully equipped kitchen with a sink, oven, and refrigerator? The scope of the project will dictate the budget, materials, and space required.
To establish your budget:
- Consider your needs for cooking appliances (grill, pizza oven, side burner, etc.).
- Factor in costs for materials (stone, wood, stainless steel, etc.).
- Think about utilities (gas, water, electricity), which may require permits or professional installation.
- Don’t forget finishing touches like countertops, cabinetry, and outdoor furniture.
The more specific you can be with your goals, the easier it will be to plan the layout and prioritize your spending.
Choose the Location & Layout
Selecting the right location for your outdoor kitchen is crucial for functionality and comfort. Consider the following:
- Proximity to the main kitchen inside your house (for ease of moving ingredients and utensils).
- Wind direction and sun exposure (you want to avoid too much wind or sun when cooking).
- The view and aesthetics of your backyard (positioning the kitchen where you can enjoy the surroundings adds to the experience).
Layout Options (L‑shape, U‑shape, Linear, Island)
There are several popular layouts for outdoor kitchens, and each offers different benefits:
- L‑shaped kitchen: Ideal for corners and offers ample counter space. This layout promotes efficiency by creating a natural cooking and prep zone.
- U‑shaped kitchen: Provides maximum workspace with three sides of counter space. It’s perfect for those who want a fully equipped kitchen.
- Linear kitchen: A single line of appliances and countertops, suitable for smaller spaces or those with limited room.
- Island kitchen: A standalone central island provides additional prep space and can be a focal point for entertaining guests.
Workflow and “Kitchen Triangle” Outdoors
When planning your outdoor kitchen layout, keep the kitchen triangle concept in mind. This involves positioning the stove, sink, and refrigerator (or cooler) in a triangular arrangement to minimize unnecessary steps while cooking. The kitchen triangle can be adapted to the outdoor setting, ensuring efficiency during meal prep.
Check Permits, Utilities & Codes
Before you start building, check local building codes and zoning laws to see if you need any permits. For outdoor kitchens that include plumbing, gas lines, or electrical work, you may need permits from local authorities.
Here are some common utilities you might need:
- Gas: For your grill, side burner, or pizza oven.
- Water: For sinks or bar areas.
- Electricity: For lighting, appliances like refrigerators, and other electrical components.
Consult with professionals to ensure that your outdoor kitchen complies with all local regulations.
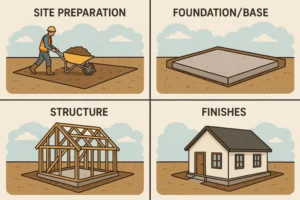
Building the Structure: Foundation to Finishes
Site Preparation & Foundation/Base
The foundation is one of the most important aspects of building an outdoor kitchen. It must be sturdy, level, and able to withstand the weight of Organization Ideas for Kitchen & Living Room appliances, countertops, and materials.
- Prepare the area: Remove any grass, debris, or obstacles from the planned space.
- Install a base: This may involve concrete slabs or a gravel base for drainage. If you’re using masonry, ensure a stable foundation to support the structure.
Framing or Masonry Build
Once the site is prepped, you’ll start building the frame or masonry structure. Framing is commonly used for wooden or composite outdoor kitchens, while stone or brick is favored for more permanent builds.
- Framing: For a wooden structure, you’ll use treated lumber to create the basic frame for countertops and cabinets. Ensure that the framing is square and level.
- Masonry: If you’re using brick or stone, you’ll need to build solid walls and support beams to anchor the kitchen’s countertop and appliances.
Plumbing, Gas & Electrical Rough‑ins
Next, you’ll need to install the utilities. This is a critical stage and may require hiring professionals:
- Plumbing: Run water lines to your sink or bar area.
- Gas: Install a gas line to power the grill or pizza oven.
- Electrical: Set up electrical lines for outdoor lighting, refrigeration, and any other electrical appliances you plan to use.
It’s essential to follow safety protocols when handling plumbing and gas lines. Consult with a licensed plumber or electrician if necessary.
Countertops, Cabinets & Storage
Once the frame is in place and utilities are installed, it’s time to add countertops, cabinets, and storage. Outdoor kitchen countertops need to be durable, weather-resistant, and easy to clean. Popular materials include:
- Granite or marble: Beautiful but heavy and expensive.
- Concrete: Customizable and durable.
- Stainless steel: Durable and modern but can get hot in the sun.
Consider built-in storage for utensils, spices, and cleaning supplies. Cabinets made from weather-resistant materials will protect your tools and supplies from the elements.
Choosing Materials & Appliances
Choosing the right materials and appliances will ensure your kitchen is both functional and stylish. Here are some recommendations:
Grills, Side Burners, Pizza Ovens
Grills are the centerpiece of most outdoor kitchens. Consider a high-quality, weather-resistant grill (gas, charcoal, or wood-fired) to meet your cooking style. Side burners are great for cooking sauces or side dishes while you grill. Pizza ovens are a popular addition, especially for those who love to entertain.
Weather‑resistant Materials (Stone, Stainless, Timber)
The materials you choose should be able to withstand outdoor conditions, including rain, wind, and sun exposure. Stone, brick, and stainless steel are ideal for creating a weather-resistant structure. When choosing materials for countertops, storage, and even seating, make sure they are designed to endure the elements.

Finishing Touches & Outdoor Kitchen Features
Lighting, Seating, Bar & Entertainment Areas
The right lighting can set the mood and provide visibility when cooking or dining in the evening. Install outdoor-specific lighting above workstations, counters, and seating areas.
For comfort, add seating around the kitchen area or a bar where guests can socialize while meals are being prepared. Consider a covered area for shade or protection from the elements, especially if you live in an area with intense sun or rain.
Weather Protection, Ventilation & Safety
When building your outdoor kitchen, don’t overlook safety and ventilation. Ensure proper airflow around cooking appliances like grills and pizza ovens. Installing an outdoor range hood or exhaust fan can help ventilate smoke and odors. Additionally, you may want to add weather protection like a pergola, retractable awning, or full roof to extend the use of your outdoor kitchen in all weather conditions.
Tips for Cost Control & Longevity
Budgeting, DIY vs Professional, Maintenance
Building an outdoor kitchen can be costly, but there are ways to save:
- DIY projects: If you’re handy, consider tackling some aspects of the build, like installing countertops or constructing cabinets. However, leave the electrical and plumbing work to professionals to ensure safety.
- Choose cost-effective materials: Composite materials for countertops and cabinets can be less expensive than natural stone or wood.
- Ongoing maintenance: Keep your outdoor kitchen clean and inspect it regularly for wear and tear. Cover appliances and furniture during the offseason to extend their lifespan.
Common Mistakes to Avoid
Mistakes Section (Poor Layout, Wrong Materials, Ignoring Utilities)
- Poor layout: A kitchen that doesn’t flow well can hinder your cooking and entertaining experience. Avoid cramped spaces or poorly planned layouts.
- Wrong materials: Choosing materials that aren’t durable enough for outdoor use will result in costly repairs or replacements.
- Ignoring utilities: Skipping on professional installation of plumbing, gas, or electrical lines can lead to serious safety issues.
Comparison: DIY vs Professional Build
Pros & Cons of DIY Build vs Hiring Contractors
- DIY build: You can save money on labor costs, but it requires time, expertise, and the ability to handle tools and construction. Mistakes could end up costing more in the long run.
- Hiring professionals: Professionals bring expertise and ensure everything is done correctly, but it can be expensive.
FAQs
- What is the first step in building an outdoor kitchen?
- The first step is planning. Define your budget, layout, and goals before starting the construction process.
- Do you need planning permission to build an outdoor kitchen?
- Depending on your location and the complexity of your outdoor kitchen, you may need planning permission, especially for plumbing, gas, or electrical work.
- How much space do you need for an outdoor kitchen?
- The space depends on the layout and appliances you plan to include, but a typical outdoor kitchen requires at least 100 square feet of space.
- Which materials are best for outdoor kitchen countertops?
- Popular materials for outdoor kitchen countertops include granite, concrete, and stainless steel due to their durability and weather resistance.
- Should you install a sink in an outdoor kitchen?
- Installing a sink is recommended for convenience, especially if you plan to cook, clean, and prepare food outdoors regularly.
- What are common layout types for outdoor kitchens?
- Common layouts include L‑shaped, U‑shaped, linear, and island designs, depending on your space and needs.
- How much does it cost to build an outdoor kitchen?
- The cost varies greatly depending on the size, materials, and appliances you choose, but a basic outdoor kitchen could cost anywhere from $5,000 to $15,000 or more.
- Can I build an outdoor kitchen myself or should I hire a pro?
- If you’re handy and have some experience with construction, a DIY project is possible. However, for electrical, gas, and plumbing work, it’s best to hire professionals.
Conclusion
Building an outdoor kitchen can be a rewarding and transformative project that enhances your home and lifestyle. By carefully planning the layout, selecting durable materials, and considering your needs, you can create a space that’s perfect for cooking and entertaining. Follow the tips, avoid common mistakes, and don’t hesitate to consult with professionals for the more complex aspects of the build. With the right approach, your outdoor kitchen will be a stunning and functional addition to your backyard for years to come.