Changing your kitchen sink may seem like a daunting task, but it’s a home improvement project that can be accomplished by most DIY enthusiasts with the right tools and a little patience. Whether you’re upgrading to a new style, replacing an old, damaged sink, or remodeling your kitchen, replacing the sink is a great way to enhance your space and functionality.
In this guide, we’ll walk you through the process of changing a kitchen sink, from gathering your tools to finalizing the installation. We’ll also address some common questions and highlight mistakes to avoid during the process.
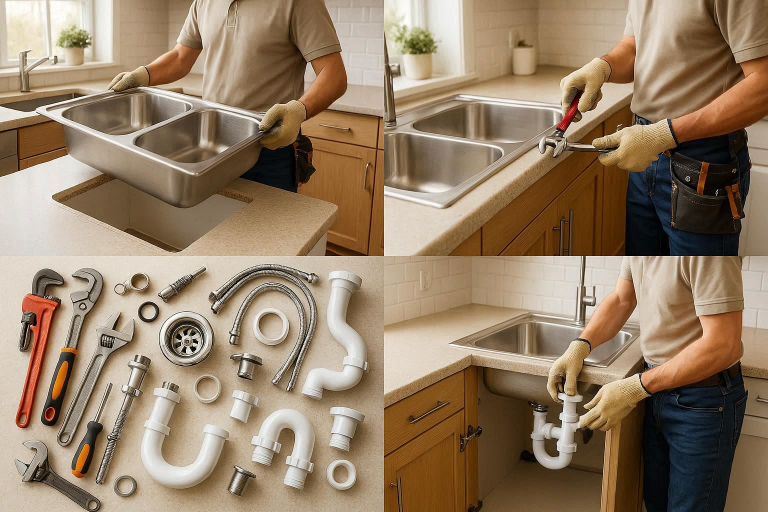
Tools and Materials Needed for Changing a Kitchen Sink
Before you begin, ensure you have all the necessary tools and materials. While this project isn’t extremely complicated, it does require the right equipment to make sure everything goes smoothly.
Essential Tools:
- Pipe Wrench: A pipe wrench helps you grip and turn the plumbing pipes, which will be essential when removing the old sink.
- Adjustable Pliers: For loosening or tightening nuts and bolts, adjustable pliers are a must-have.
- Basin Wrench: This specialized wrench is perfect for reaching tight spaces, like underneath the sink, to unscrew faucets and nuts.
- Plumber’s Putty: This is a soft, moldable material used to create a watertight seal between your sink and its components.
- Silicone Sealant: This helps ensure a leak-free seal around the edges of the sink once it’s installed.
- Teflon Tape: Used on plumbing threads to prevent leaks at pipe connections.
- Screwdrivers: Both flathead and Phillips screwdrivers will help with removing screws and fasteners.
- Bucket or Towels: Keep a bucket or towels handy to catch any water that may spill out when disconnecting the plumbing.
- Tape Measure: Measuring your new sink and countertop space is crucial to ensure everything fits properly.
Materials:
- New Kitchen Sink: This is the main item you’ll be replacing, so choose one that fits your kitchen’s aesthetic and size requirements.
- Sink Faucet (optional): If you’re upgrading the faucet along with the sink, make sure it’s compatible with your new sink.
- New Drain Assembly (optional): You may want to replace the drain assembly, which includes the drain flange, stopper, and pipes.

Preparing the Area Before You Start
Before you get to work, it’s essential to clear and prepare the area around your sink.
Clear the Workspace:
Start by removing all dishes, soap, and items from around the sink area. You’ll want the area to be clean and free of clutter so that you can move around easily while working.
Shut Off the Water Supply:
Before disconnecting anything, ensure that the water supply is turned off. You’ll find the water supply valves under the sink, usually located along the back wall. Turn both the hot and cold water valves clockwise to close them.
Disconnect the Plumbing:
Next, you’ll need to disconnect the plumbing. Start by detaching the water supply lines, which are usually connected to the faucet. Then, remove the drain pipes and disposal unit (if you have one). Place a bucket or some towels underneath to catch any remaining water that may spill out when you loosen the pipes.
Removing the Old Sink
With the area prepared, it’s time to remove the old sink.
Loosen and Remove the Faucet:
If you’re replacing the faucet along with the sink, begin by unscrewing the faucet from the sink. Use a basin wrench to reach Cleaning Guide for Home & Kitchen underneath and loosen the nuts holding the faucet in place. Once the faucet is loose, please remove it from the sink.
Unscrew and Detach the Sink from the Countertop:
The next step is to detach the sink from the countertop. Most sinks are secured with clips or screws along the rim. You can use a screwdriver or basin wrench to unscrew these. If the sink is secured with clips, you may need to loosen them with the appropriate tool.
Take Out the Old Sink Carefully:
With the clips or screws removed, it’s time to lift the old sink out. Be careful, as older sinks can be heavy, and if it’s a porcelain or cast iron sink, it can be quite bulky. Have a helper on hand to avoid dropping the sink. If your sink is glued to the countertop, you may need to gently pry it loose with a putty knife or similar tool.
Installing the New Sink
Now comes the exciting part: installing your new kitchen sink.
Prepare the New Sink:
Before you set the new sink in place, apply a generous amount of plumber’s putty or silicone sealant around the edges of the sink’s lip. This helps create a watertight seal and prevents leaks once the sink is installed. Be sure to follow the manufacturer’s instructions for the best sealant to use.
Position the New Sink:
Carefully align the new sink with the cutout in the countertop. Lower the sink into place, making sure it fits snugly into the opening. Once it’s positioned properly, press down gently to ensure it’s securely seated.
Secure the Sink with Clips or Screws:
Most sinks are held in place with clips or screws. Use the screws provided with the sink to secure it from underneath the countertop. Tighten the clips or screws evenly to prevent any warping of the sink’s lip.
Reattach the Faucet and Drain Assembly:
Now that the sink is securely installed, it’s time to reconnect the faucet. Install the faucet on the new sink according to the manufacturer’s instructions, making sure all seals are tight to prevent leaks.
Next, install the new drain assembly, which may include the drain flange and stopper. Carefully follow the instructions to ensure the assembly is correctly attached. Use Teflon tape on the threads of the drain pipes to prevent leaks.

Reconnecting the Plumbing
With the sink installed, it’s time to reconnect the plumbing.
Reconnect Water Lines:
Reconnect the water supply lines to the faucet. Tighten them with adjustable pliers, but be careful not to overtighten and damage the pipes. Once connected, make sure everything is secure.
Reattach the Drainpipes:
Now, reconnect the drainpipes, starting with the drain flange and stopper. Again, use Teflon tape on the threads to ensure a leak-free seal. Tighten the drain connections, and make sure everything is aligned properly.
Check for Leaks:
Before you finish, it’s important to check for leaks. Turn the water supply back on and test both the faucet and drain for any signs of leaks. If you notice any, tighten the connections further or reseal with plumber’s putty or silicone sealant.
Final Checks and Clean-Up
You’re almost done! A few final steps will ensure your new sink is ready to go.
Test the Sink:
Turn on both the hot and cold water, checking the flow and ensuring everything works as it should. Test the drainage as well to make sure there are no blockages or slow draining.
Clean Up:
Remove any excess plumber’s putty or silicone sealant around the edges of the sink. Clean the surrounding area and dispose of any old materials and the old sink properly. Make sure the area is neat and safe before you start using the new sink.
Common Mistakes to Avoid When Changing a Kitchen Sink
As with any home improvement project, there are some common mistakes that can make the process more difficult than it needs to be.
- Improper Sealing Around the Edges: Not applying enough plumber’s putty or silicone sealant can lead to leaks. Be generous with the sealant, but don’t overdo it.
- Not Checking for Leaks Before Finishing the Job: Always check for leaks after reconnecting the plumbing. It’s easier to fix a leak before you finish cleaning up than after everything is in place.
- Using the Wrong Size Sink for the Space: Measure your countertop and sink space carefully to avoid purchasing a sink that doesn’t fit.
- Skipping the Use of Teflon Tape on Plumbing Connections: Teflon tape helps prevent leaks in the plumbing. Always use it on threaded connections.
FAQ
How long does it take to change a kitchen sink?
On average, changing a kitchen sink takes around 2 to 4 hours, depending on the complexity of the installation and whether you’re replacing the faucet and drain assembly as well.
Can I change my kitchen sink without professional help?
Yes, changing a kitchen sink is a manageable DIY project for most people. However, if you’re uncomfortable working with plumbing or electrical components, it’s always a good idea to consult a professional.
How do I know if the new sink will fit my existing space?
Measure the dimensions of your countertop’s cutout carefully before purchasing a new sink. Make sure the new sink will fit in the same space and align with your plumbing.
What type of sink is easiest to install?
Top-mount sinks are generally easier to install than under-mount sinks because they sit on top of the countertop rather than being mounted underneath it.
Do I need to replace the faucet when changing the sink?
You don’t necessarily need to replace the faucet, but if it’s old or damaged, it might be a good idea to replace it while you’re changing the sink.
Can I reuse the old plumbing connections with the new sink?
In many cases, you can reuse your old plumbing connections if they are in good condition. Just be sure to check that they fit the new sink properly and replace any worn-out parts.
Conclusion
Changing your kitchen sink is a rewarding DIY project that can make a big difference in your kitchen. By following the steps outlined in this guide, you can easily replace your sink with a new one, ensuring it fits your space and functions properly.
While the project is manageable, it’s important to take your time and double-check everything to avoid leaks or mistakes. If you’re ever unsure, don’t hesitate to consult a professional plumber for help. So, grab your tools and get started on transforming your kitchen today!