There’s a big difference between a “good” steak and one that stops the table mid-sentence. The secret isn’t luck or fancy equipment—it’s a few simple steps that create a jaw-dropping, steakhouse-level crust while keeping the center tender and juicy. In this guide, I’ll walk you through everything that matters: choosing the right cut, prepping it like a pro, setting up your grill, nailing doneness, and finishing with flavor. By the end, you’ll have a repeatable process you can trust every time you grill.
What you’ll learn (quick glance):
- Which cuts grill best—and why marbling and thickness matter
- The smart way to dry-brine, season, and oil
- Two-zone fire setup for control (critical!)
- Exactly when to sear, when to finish indirect, and when to rest
- Sauces, compound butters, sides, and pairing ideas
- Troubleshooting for common mistakes—so you don’t make them twice
I cook and test these methods often, and the steps below are designed for reliable, real-world results at home. Let’s get you that steakhouse crust—without the steakhouse bill.
Choose the Right Steak
Best Cuts for Grilling
Some steaks practically grill themselves. Look for cuts with natural marbling (those tiny white lines of fat) because fat equals flavor and moisture.
- Ribeye: King of marbling; rich, buttery, forgiving.
- Strip (New York): Slightly leaner than ribeye with a bold beefy bite.
- T-bone/Porterhouse: Two steaks in one (strip + tenderloin). Great presentation.
- Filet mignon: Lean and tender; benefits from butter basting or sauce.
- Picanha (top sirloin cap): Beefy with a delicious fat cap; fantastic grilled.
Thickness target: Aim for 1¼–1½ inches. Thinner steaks can overcook before a crust forms; thicker steaks give you more control and work beautifully with reverse sear.
USDA Grades & Sourcing
- Select vs. Choice vs. Prime:
- Select is leaner with less marbling—easier to overcook.
- Choice is a great sweet spot for value and flavor.
- Prime has the most marbling and the best insurance against dryness.
- Dry-aged vs. wet-aged:
- Dry-aged develops a concentrated, nutty flavor and tender texture.
- Wet-aged stays juicy, with a cleaner, beef-forward taste.
- Grass-fed vs. grain-finished:
- Grass-fed is leaner, slightly more minerally; cook gently and don’t overshoot temps.
- Grain-finished tends to be richer and more marbled—very grill-friendly.
Choose reputable sources: a trusted butcher or a high-quality grocer. Consistent sourcing = consistent results.
Thickness & Bone-In vs. Boneless
- Bone-in: Insulates meat near the bone (a touch slower to cook), looks dramatic on the plate, and can add subtle flavor.
- Boneless: Cooks more evenly and quickly; easier to manage for beginners.
How thickness drives method:
- 1¼–1½ in steaks: Sear over direct heat for crust, then finish indirect.
- 2 in and thicker: Consider reverse sear for even doneness edge-to-edge.
Prep Like a Pro
Drying, Trimming, and Salting
- Pat dry thoroughly. Surface moisture steams instead of browning.
- Trim ragged edges (they burn) but don’t over-trim the fat cap; a thin cap helps baste the steak.
- Salt early (dry-brine): Season generously with kosher salt 45–60 minutes before grilling—or up to 24 hours on a rack, uncovered, in the fridge. This pulls seasoning deeper and dries the surface for better crust.
Seasoning Basics
- Baseline: Salt + freshly cracked black pepper = pure steak flavor.
- Optional add-ons: Garlic powder, onion powder, smoked paprika, or a low-sugar steak rub. (High sugar burns at grill temps.)
- If you love a bold crust, pepper right before searing to prevent over-bittering.
Bringing to Room Temperature
- Let the steak sit 20–30 minutes on the counter before grilling for more even cooking.
- Light oil film just before it hits the grill (use a high-smoke-point oil like avocado, canola, or grapeseed). Oil the steak—not the grates—for less smoke and more control.

Set Up Your Grill for Success
Two-Zone Fire (Critical)
Think of your grill as two kitchens in one:
- Direct zone: High heat 500–600°F (260–315°C) for searing and crust.
- Indirect zone: Moderate heat 325–375°F (165–190°C) for finishing gently.
This setup lets you move the steak off the flames the Guide to Mastering Everyday Cooking moment it has enough color, then cruise to your target temp without burning.
Fuel: Charcoal vs. Gas
- Charcoal: Deeper sear and aroma; use a chimney starter for clean ignition. Add a chunk of apple, cherry, oak, or hickory for subtle smoke.
- Gas: Convenience king; preheat 10–15 minutes. Keep grates clean for even browning and minimal sticking.
Neither is “better”—use what you have and master your setup.
Tools You’ll Actually Use
- Sturdy tongs (not a fork).
- Instant-read thermometer (your best friend).
- Grill brush and a folded paper towel with tongs for a quick oil wipe if needed.
- Optional: cast-iron skillet/plancha for restaurant-quality crust, heat-proof gloves for safety.
Cooking Methods to Nail Doneness
Classic Sear → Finish Indirect
- Sear: Place steak over direct heat for 2–3 minutes per side to build crust. Don’t fuss; let it sear.
- Finish: Move to indirect heat. Close the lid and cook until your steak is within 3–5°F of your target pull temp (see chart below).
- Rest: Remove to a warm plate or board, tent loosely with foil 5–10 minutes.
When to choose this method: Great for 1¼–1½ inch steaks like ribeye and strip.
Reverse Sear (Thick Cuts)
- Start indirect at 250–275°F (120–135°C) until internal temp is 10°F below your target.
- Sear hot and fast over direct heat 60–90 seconds per side to finish.
- Rest briefly before slicing.
Why it works: Even doneness edge-to-edge and a killer crust without burning the outside. Best for thick steaks or bone-in cuts.
Cast-Iron on the Grill (Restaurant Crust)
- Put a cast-iron skillet or plancha on the grates and preheat 5–7 minutes until blazing hot.
- Add a thin film of high-smoke-point oil.
- Sear 2–3 minutes per side; optionally butter-baste with a knob of butter + smashed garlic + thyme for the last 30 seconds.
- Move to indirect if needed to reach temp, then rest.
Pro tip: This is fantastic on gas grills for an indoor-kitchen quality sear outdoors.

Target Temperatures & Timing
Internal Temp Guide (Pull Temps)
Remember: temps rise 3–5°F during the rest.
- Rare: Pull at 120–125°F (49–52°C)
- Medium-rare: Pull at 130–135°F (54–57°C)
- Medium: Pull at 140–145°F (60–63°C)
- Medium-well: Pull at 150–155°F (66–68°C)
Use your instant-read thermometer in the thickest center (avoid bone) and check more than once if needed. Consistency beats guesswork.
Time Estimates by Thickness (Guide, Not Law)
- 1¼–1½ in steak:
- ~6–8 minutes total sear time over direct (split between sides)
- plus 3–6 minutes indirect to finish
- Reverse sear:
- 20–30 minutes indirect, then 2–3 minutes total sear
Grills vary. Wind, outside temp, and steak thickness all matter—so let temperature, not the clock, be the final judge.
Thermometer & Touch
- Thermometer habit wins. It removes guesswork and saves expensive steaks.
- Touch test (quick primer): With practice, medium-rare feels springy (like the base of your thumb when touching your middle finger). Use touch as a cross-check, not the sole method.
Resting and Slicing for Juiciness
Rest the Right Way
- Move the steak to a clean plate or board.
- Tent loosely with foil 5–10 minutes (don’t wrap tight—steam softens the crust).
- Resting lets juices redistribute, so they end up in your slice—not on the board.
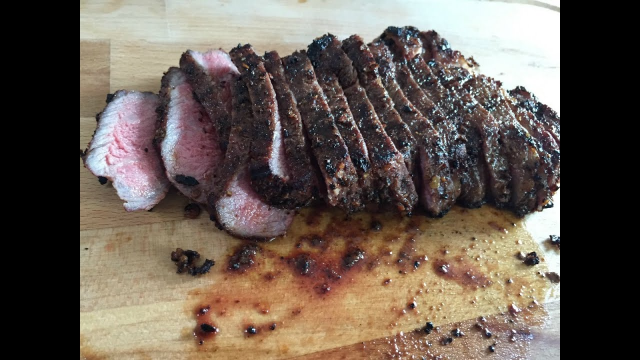
Slice Against the Grain
- Identify the grain (the direction of the muscle fibers).
- Hold your knife at a slight bias and slice across those fibers.
- For bone-in steaks, remove the bone first, then slice for easy serving.
Flavor Boosters & Finishes
Compound Butters
Make these ahead, roll into a log, and slice “coins” to melt over hot steak:
- Garlic-Herb: Soft butter + minced garlic + parsley + chives + lemon zest + pinch of salt.
- Blue Cheese-Chive: Butter + crumbled blue + chives; rich and steakhouse-classic.
- Smoked Chili-Lime: Butter + smoked paprika + chili flakes + lime zest for a zippy finish.
Sauces That Sing
- Chimichurri: Parsley, oregano, garlic, chili, olive oil, red wine vinegar—herby and bright.
- Peppercorn sauce: Creamy with cracked pepper and a splash of brandy or stock.
- Red wine reduction: Silky, savory, elegant for special nights.
- Salsa verde: Sharp, caper-forward punch that cuts through richness.
Smoke Kisses & Wood Pairing (Charcoal)
- Mild woods (apple, cherry) flatter leaner cuts like strip or filet.
- Stronger woods (oak, hickory) stand up to ribeye’s richness.
- Add just a chunk or two—this is steak, not brisket.
Sides & Pairings (Complete the Plate)
Classic Sides
- Grilled asparagus with lemon and flaky salt
- Smashed potatoes crisped in olive oil and herbs
- Creamed spinach (indulgent, steakhouse-style)
- Charred corn salad with scallions and lime
Salads & Carbs
- Arugula-parmesan lemon salad (peppery freshness)
- Caesar salad (classic comfort)
- Garlic bread or herbed rice (to soak up juices and sauces)
Drinks
- Reds: Cabernet Sauvignon, Malbec, Syrah/Shiraz (tannin meets fat—magic).
- Beer: Malty ambers, brown ales, or stouts complement the char.
- Cocktails: A bourbon old fashioned plays beautifully with smoky grilled notes.
Safety & Clean-Up
Food Safety Basics
- Keep raw and cooked areas separate. Don’t reuse plates or tongs from raw steak.
- Rest the steak on a clean board or tray.
- Wash hands and tools thoroughly.
Manage Flare-Ups
- Have that cool (indirect) zone ready.
- If flames jump, close the lid and vents briefly; move steak to indirect until flames settle.
- Trim excess surface fat before cooking to minimize flare.
Post-Grill Care
- Brush grates while hot to lift residue easily.
- Lightly oil grates (when cooled) to prevent rust and next-cook sticking. A clean grill gives better crust next time.
Troubleshooting & Common Mistakes
Gray, Overcooked Steak
Likely causes: Fire is too low, or steak is spent too long indirect.
Fix: Sear hotter and shorter; monitor internal temperatures closely.
Burnt Outside, Raw Inside
Likely causes: Heat too high for thickness; no indirect zone.
Fix: Use a two-zone setup or reverse sear for thicker cuts.
Weak Crust
Likely causes: Wet surface, dirty grates, low heat.
Fix: Pat very dry, clean grates, preheat longer, and avoid overcrowding.
Quick Reference (Snippet Bait)
Perfect Grilled Steak in 5 Steps
- Dry-brine with salt 1–24 hours.
- Preheat two-zone grill (hot direct + cooler indirect).
- Sear 2–3 min/side over high heat.
- Finish indirect to target pull temp.
- Rest 5–10 min, then slice against grain.
Tape that to your fridge. It works.
SEO Content Tips (Optional)
Keywords to Sprinkle Naturally
- “how do you cook steak on the grill perfectly” (exact)
- “perfect grilled steak,” “grill steak temperatures,” “reverse sear steak,” “two-zone grill method”
Use them in headings, intro, alt text, and meta description—always in natural language.
Internal Links & Enhancements
- Link to your cut guide, thermometer review, compound butter recipes, and sauce pages.
- Add FAQ schema and, if you include a recipe card, Recipe schema for richer results.
FAQs
What grill temperature is best for steak?
Use high heat (500–600°F / 260–315°C) to sear, then 325–375°F (165–190°C) indirect to finish. The two-zone setup prevents burning while you hit your target temp.
How long do you grill a 1½-inch steak?
Typically 2–3 minutes per side over direct for crust, then 3–6 minutes indirect to reach 130–135°F (medium-rare). Always verify with a thermometer.
Should I oil the steak or the grates?
Oil the steak lightly right before it hits the grill. Clean, preheated grates + oiled steak = better crust and less smoke.
Is reverse sear better for thick steaks?
Yes. For steaks 2 inches or thicker, reverse sear gives edge-to-edge doneness and a final high-heat sear for crust—without overcooking the exterior.
Do I close the grill lid while searing?
- Gas grills: Usually yes to retain heat.
- Charcoal: Lid down helps tame flare-ups and stabilize temperature, but you can open briefly to flip.
How long should steak rest after grilling?
5–10 minutes, loosely tented. Resting redistributes juices, so every slice stays moist.
Can I grill frozen steak?
You can, using a sear-then-indirect approach, but the best texture comes from thawed steaks. If grilling from frozen, expect a longer indirect phase and a less even center.
Conclusion
Perfect grilled steak isn’t complicated—it’s consistent. Choose a well-marbled, 1¼–1½-inch steak. Dry-brine with salt. Build a two-zone fire so you can sear hard and finish gently. Use a thermometer to pull at the right temp, rest for 5–10 minutes, and slice against the grain. Layer on a compound butter or quick sauce, add a fresh side, and you’ve got a steakhouse experience at home.
Now it’s your turn. Try both classic sear and reverse sear to see which you prefer. Experiment with wood flavors, rubs, and butters. And when you nail that perfect crust, share your temps, favorite cuts, and sides in the comments—bonus points if you tag your grill wins on social. Happy grilling!