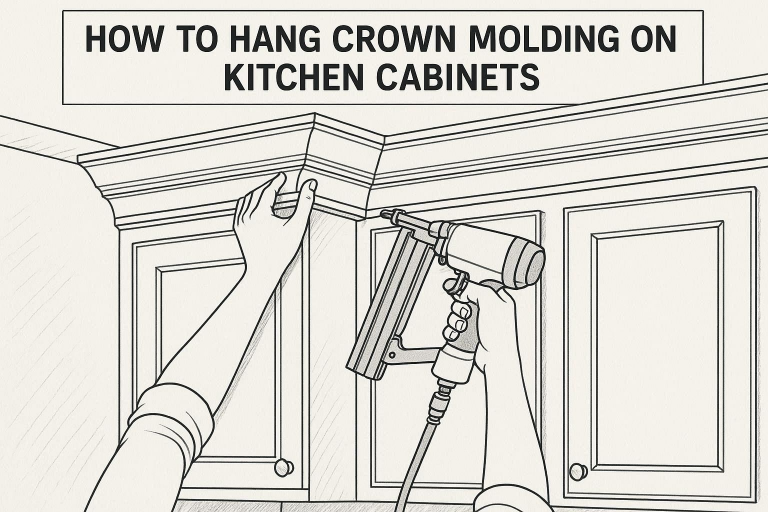
When it comes to elevating the aesthetics of your kitchen, few elements make as significant an impact as crown molding. This classic detail is often used in interior design to add a touch of elegance and sophistication. When applied to kitchen cabinets, crown molding not only enhances the visual appeal but also adds a sense of luxury and completeness to the space.
Crown molding offers both aesthetic and functional benefits. It seamlessly bridges the gap between your cabinets and ceiling, creating a polished, cohesive look. But beyond just looks, it also helps to hide imperfections where the cabinets meet the wall or ceiling, providing a smooth, continuous line.
In this guide, we’ll explore everything you need to know about crown molding for kitchen cabinets—from the different types of molding available to how to install it and cut it, as well as some creative ideas to personalize your space. By the end, you’ll feel confident tackling this DIY project, no matter your skill level.
Types of Crown Molding for Kitchen Cabinets
Choosing the right crown molding for your kitchen cabinets can completely transform the overall look of the Ideas for Kitchen and Living Room. Here are the most common styles and materials to consider:
Overview of Various Crown Molding Styles
- Traditional: This style features ornate, detailed carvings and flourishes. It is perfect for kitchens with a classic or vintage feel. Traditional molding adds a sense of grandeur to your cabinets, making it ideal for larger kitchens or those with a more opulent design.
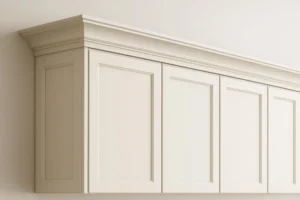
- Modern: Modern crown molding tends to be cleaner and more straightforward, focusing on sleek lines and minimal ornamentation. It’s perfect for contemporary kitchens and those that embrace simplicity and geometric design.
- Farmhouse: If you love rustic charm, farmhouse crown molding is the way to go. It often uses wide, simple moldings that complement the natural textures found in farmhouse-style kitchens. This style is perfect for kitchens with wooden cabinets and a warm, inviting atmosphere.
- Transitional: This style combines the elegance of traditional molding with the simplicity of modern designs. It’s the perfect middle ground for those who want the best of both worlds. Transitional molding works well in kitchens that mix both classic and modern elements.
Materials Used for Crown Molding
- Wood: Classic and durable, wood molding is often the first choice for many homeowners. It provides a natural, high-quality look and is great for staining or painting to match your kitchen decor.
- MDF (Medium Density Fiberboard): MDF is a popular option for those on a budget. It’s lightweight, easy to work with, and more affordable than solid wood. MDF can be painted to resemble wood, making it a versatile choice for many kitchens.
- Polyurethane: Polyurethane is a synthetic material that’s durable, lightweight, and easy to install. It’s often used in more intricate molding designs and is a great option for homeowners who want the look of wood but at a lower price point.
Choosing the Right Crown Molding for Your Kitchen
- Match the Molding Style to the Cabinet Design: Choose crown molding that complements the design of your cabinets. If you have ornate, traditional cabinets, a more intricate crown molding will enhance their beauty. For sleek, modern cabinets, go for simple, streamlined molding.
- Consider Budget: The material you choose will significantly impact your budget. Wood is the most expensive option, while MDF and polyurethane offer budget-friendly alternatives without sacrificing style.
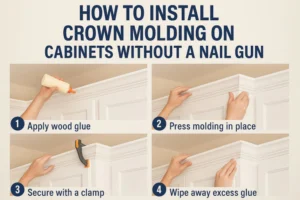
How to Install Crown Molding on Cabinets Without a Nail Gun
If you don’t have a nail gun, don’t worry! You can still install crown molding on your kitchen cabinets using basic hand tools. Here’s what you’ll need:
Tools You’ll Need for Installation
- Hammer and finishing nails
- Wood glue or adhesive
- Measuring tape, level, and miter saw
- Miter box or coping saw (optional, for detailed cuts)
Step-by-Step Instructions for Installing Crown Molding Manually
- Measure and Mark the Cabinet Edges: Use a measuring tape to determine where the crown molding will be attached to the top of your cabinets. Mark the edges with a pencil for accuracy.
- Cut the Crown Molding Pieces to Size: Measure the length of each cabinet section and cut the crown molding accordingly. If you’re dealing with corners, make sure to cut the molding at the correct angle (typically 45 degrees).
- Attach the Molding Using Nails and Wood Glue: Start at one end of the cabinet and apply a thin layer of wood glue to the back of the crown molding. Secure it in place using finishing nails. If needed, use a hammer to gently tap the nails in, ensuring the molding is flush with the cabinet.
- Ensuring a Snug Fit and Neat Finish: Once all the pieces are in place, check the fit. If necessary, use wood filler to cover nail holes or gaps between the molding and cabinets. Sand the area smooth before painting or staining.
How to Cut Crown Molding on Cabinets
Cutting crown molding can be tricky, but with the right technique, you’ll get clean, precise cuts every time.
Understanding the Angles and Cuts
Crown molding typically requires two types of cuts:
- Inside corners: These are where two pieces of molding meet at a corner on the inside of the cabinet.
- Outside corners: These are used when molding meets at an outside corner.
Most crown molding is cut at a 45-degree angle, but make sure to check the angle of your specific molding to ensure accuracy.
Step-by-Step Guide on Making the Cuts
- Set the Correct Angle on the Saw: When cutting with a miter saw, set the saw blade to a 45-degree angle. Be sure to measure your cuts twice to ensure accuracy.
- Cutting Inside vs. Outside Corners: For inside corners, both pieces of crown molding need to be cut at angles that fit together perfectly. For outside corners, the cuts need to be mitered to form a sharp angle.
- Tips for Ensuring a Perfect Fit: To avoid errors, use a coping saw for detailed inside corners. Always test the cuts by dry-fitting the pieces before permanently attaching them.
Simple Crown Molding for Kitchen Cabinets
If you’re looking for an easy and cost-effective solution, simple crown molding is a great choice. This style works best in modern kitchens or those with minimalistic decor.
Why Simplicity Works
- Ideal for Modern Kitchens: Simple crown molding provides a clean, crisp look that complements sleek, modern cabinets.
- Easy to Install: With fewer intricate details, simple crown molding is easier and faster to install, making it perfect for DIY projects.
- Cost-Effective: Simple crown molding tends to be cheaper than more elaborate styles, making it an affordable way to enhance your kitchen.
Steps for Installing Simple Crown Molding
- Opt for Clean, Straight Cuts: Since simple crown molding doesn’t require intricate cuts, focus on clean, straight cuts that match the measurements of your cabinets.
- Use Minimal Tools and Adhesives: For this style, a hammer, finishing nails, and wood glue are all you need. Keep the process simple and straightforward.
- Finishing Touches: Once installed, make sure the molding fits snugly and looks seamless. Sand and paint as needed.
Kraftmaid Crown Molding Installation Instructions
Kraftmaid is a trusted brand in kitchen cabinetry, and their crown molding options are no exception.
Overview of Kraftmaid Products
Kraftmaid offers a variety of crown molding styles that are perfect for different kitchen designs. Their high-quality materials ensure durability, and their easy-to-follow instructions make installation a breeze.
Step-by-Step Guide for Kraftmaid Molding
- Follow the Instructions: Kraftmaid provides clear, step-by-step instructions with each molding kit. Follow these directions for the best results.
- Handling Pre-Finished Molding: Kraftmaid’s pre-finished molding is a great option for a hassle-free installation. Be sure to handle the molding carefully to avoid scratches or chips.
- Adjusting for Different Cabinet Sizes: If your cabinets are unusually large or small, Kraftmaid offers molding options that can be customized to fit your needs.
Kitchen Cabinet Trim Moulding
Trim molding is another way to add personality to your kitchen cabinets. While crown molding is typically used to finish the top, trim molding adds decorative details to the edges.
What is Kitchen Cabinet Trim Molding?
Trim molding is applied to the edges of cabinets to create a more polished, finished look. It is usually simpler than crown molding but still adds depth and character.
Difference Between Trim Molding and Crown Molding
- Trim Molding: Primarily used for edges and smaller areas, trim molding is often used for finishing or outlining cabinetry.
- Crown Molding: Typically applied at the top of cabinets, crown molding serves both decorative and functional purposes, adding height and elegance.
Installation Tips for Trim Molding
- Measure carefully before attaching trim around the edges of your cabinets.
- Use wood glue for a strong bond, and hammer in finishing nails for a secure fit.
Kitchen Cabinet Crown Molding Ideas
Ready to get creative? Crown molding can be used in various ways to customize your kitchen cabinets. Here are a few ideas to get you started:
Creative Ideas to Customize Your Kitchen Cabinets
- Mixing Materials: Combine wood with metal elements to add contrast and texture.
- Contrasting Colors: Use contrasting paint or stain colors to make your crown molding stand out from the cabinets.
- Decorative Accents: Add carved details, rosettes, or other accents to personalize your crown molding.
Styling the Kitchen with Crown Molding
- Match to Other Features: Coordinate your crown molding with the backsplash or cabinet handles to create a cohesive look.
- Enhance High Ceilings or Smaller Kitchens: Use crown molding to visually extend the height of your kitchen or to make a small space appear larger.
Conclusion
Installing crown molding on kitchen cabinets is a simple and effective way to add elegance and character to your kitchen. Whether you choose traditional, modern, or farmhouse styles, the right crown molding will transform your space.
Remember, the key to a successful crown molding installation is choosing the right materials, taking your time with measurements, and ensuring a snug fit. If you’re a DIY enthusiast, simple molding options are easy to install, while more intricate designs can be tackled with patience and care.
Call to Action
Have you recently installed crown molding in your kitchen? Share your experiences or ask any questions you have in the comments below. And don’t forget to subscribe for more home improvement tips and kitchen design ideas!