Have you ever walked into a kitchen and instantly felt wowed, not by the appliances or the cabinets, but by the backsplash? That strip of tiles behind your counters might seem small, but it packs a serious design punch. A backsplash can completely transform the look and feel of your kitchen.
Beyond style, it’s also a silent hero—it protects your walls from splashes, stains, and heat damage. The best part? You don’t need to be a pro to install one. With the right tools and a little patience, anyone can learn how to tile a kitchen backsplash quickly and stunningly.
Whether you’re a first-time DIYer or just looking for a weekend home upgrade project, this guide will walk you through everything you need—step by step.
Why Tile a Kitchen Backsplash?
Boost Your Kitchen’s Visual Appeal
Think of your backsplash as the jewelry of your kitchen. Just like a statement necklace can elevate a simple outfit, the right backsplash tiles can instantly add character, personality, and texture. From sleek subway tiles to vibrant mosaics, your backsplash sets the mood.
For example, a homeowner I worked with chose glossy white subway tiles for her tiny apartment kitchen. The change was so dramatic her guests thought she had remodeled the entire space—when all she did was add a backsplash.
Practical Benefits Beyond Style
Looks aside, backsplashes are practical workhorses. Cooking often leaves splatters of grease, sauce, or steam that are tough to clean off bare walls. Tiles create a barrier that’s not only easy to wipe down but also resistant to heat and moisture.
Imagine trying to scrub tomato sauce off painted drywall—frustrating, right? With a backsplash, it’s as easy as a quick swipe with a damp sponge.
Increases Home Value
A backsplash is one of those upgrades that offers an excellent return on investment (ROI). According to real estate experts, kitchens are among the top selling points of a home. Even a modest backsplash project can make your kitchen look polished and modern, which helps increase resale value.
In other words, tiling a backsplash is not just about style—it’s a smart financial move.
Tools & Materials You’ll Need
Before you start, make sure you’ve gathered everything. Preparation is key to a smooth DIY project.
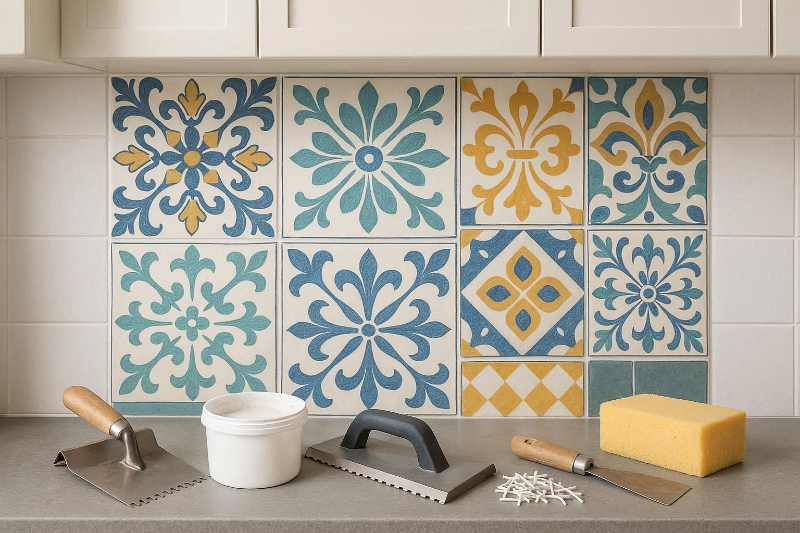
Essential Tools
- Tile cutter or wet saw – for trimming tiles to fit.
- Notched trowel – spreads adhesive evenly.
- Tape measure & level – ensures straight lines.
- Rubber grout float – presses grout into gaps.
- Sponge & bucket – for cleaning as you go.
Must-Have Materials
- Tiles – subway, mosaic, or your chosen design.
- Thin-set mortar or adhesive – bonds tiles to the wall.
- Tile spacers – keep even gaps between tiles.
- Grout – fills the gaps and locks tiles in place.
- Sealant – protects grout and makes it waterproof.
Safety Equipment
Don’t forget protection—DIY can get messy.
- Gloves – protect your hands from cuts.
- Goggles – shield your eyes while cutting tiles.
- Dust mask – prevents inhalation of dust particles.
Prepping Your Kitchen Wall
Skipping prep is like painting without primer—it won’t end well.
Clear & Clean the Surface
Remove outlet covers, scrape away old caulk, and wash the wall with a degreaser. Even a Cleaning Guide for Home & Kitchen thin layer of grease can prevent tiles from sticking.
Measure & Plan Your Layout
Dry-lay a few rows of tiles on the counter to visualize the design. This avoids awkward slivers of tiles in corners. Pro tip: start in the center and work outward for symmetry.
Protect Counters & Outlets
Cover countertops with plastic sheets or cardboard, and tape around outlets and switches. This step will save you lots of cleanup later.
Step-by-Step Guide: How to Tile a Kitchen Backsplash
Step 1 – Apply Adhesive
Using a notched trowel, spread a thin layer of mortar over a small section of the wall. Don’t cover the entire wall at once—it dries quickly.
Step 2 – Place the Tiles
Press the first tile into the adhesive with a slight wiggle to ensure a strong bond. Insert spacers between tiles to keep consistent gaps.
Step 3 – Cut Tiles as Needed
When you reach outlets or edges, measure carefully and cut tiles using a tile cutter or wet saw. Always wear goggles when cutting.
Step 4 – Let Tiles Set
Once all tiles are placed, allow them to dry for at least 24 hours before moving on to grout. This prevents shifting.
Step 5 – Apply Grout
Mix grout according to package instructions. Use a grout float to press it into the gaps, working diagonally across the tiles. Wipe off excess with a damp sponge.
Step 6 – Seal & Finish
After grout has cured, apply a sealer to prevent stains and moisture damage. Finally, clean the tiles and step back to admire your new backsplash!
Design Ideas for a Stunning Finish
Classic Subway Tiles
Timeless, affordable, and versatile. Perfect for minimalist kitchens.
Bold Patterns & Colors
Add drama with Moroccan-inspired tiles or vibrant hues for a lively vibe.
Mosaic & Glass Styles
Great for modern, artistic flair. Glass reflects light, making small kitchens look bigger.
Budget-Friendly Peel-and-Stick Options
Perfect for renters or quick updates. Easy to install and remove without damaging walls.
Common Mistakes to Avoid
- Skipping surface prep – Adhesive won’t stick to greasy walls.
- Using the wrong adhesive – Not all adhesives work for every tile. Check manufacturer guidelines.
- Not sealing grout – Leads to stains and mold.
- Rushing the drying process – Patience pays off. Let adhesive and grout cure fully.
Pro Tips for a Flawless Backsplash
- Start from the center – This creates a balanced, symmetrical look.
- Always use a level – Even small tilts become noticeable over large surfaces.
- Choose light grout for a modern feel – It makes tiles look sleek and continuous.
- Test a small section first – Ensures your method works before committing to the whole wall.
FAQ
How long does it take to tile a backsplash?
Most DIYers complete it in 1–2 days: one day for tiling, another for grouting and sealing.
Can I tile over an existing backsplash?
Yes, if the old surface is smooth and solid. However, tiling over damaged or uneven surfaces isn’t recommended.
What’s the cheapest backsplash option?
Peel-and-stick tiles are the most affordable and renter-friendly option.
Do I need to seal all types of tiles?
Not always. Ceramic tiles don’t need sealing, but natural stone and grout do.
How do I clean and maintain my backsplash?
Use mild soap and water for regular cleaning. Avoid abrasive cleaners that can damage grout or tile finishes.
Conclusion
A kitchen backsplash is more than just a design feature—it’s a blend of function and style. It protects your walls, boosts home value, and adds personality to your space. Best of all, you don’t need professional skills to do it.
By following this guide, gathering the right tools, and applying patience, you’ll create a backsplash that’s not only quick to install but also stunning to look at.